Rancher 支持对接 Shibboleth + OpenLDAP 进行用户身份认证。
环境信息:
- Rancher: v2.9.4
- Shibboleth: 4.3.1
- OpenLDAP: ldap-utils 2.5.19+dfsg-0ubuntu0.22.04.1
Shibboleth
Shibboleth 是一个完整的单点登录(SSO)和联合认证(Federated Identity)系统,遵循 SAML2.0 协议。
它不是一种协议,而是一个开源软件套件,包含:
- Shibboleth IDP(身份提供者)
- Shibboleth SP(服务提供者)
SAML2.0
而 SAML2.0 是一种 基于 XML 的身份联合(Federation)协议,让用户可以在 A 系统登录后无密码地访问 B 系统等其他服务 —— 典型场景就是企业级 SSO(Single Sign-On)。
核心概念:
- IDP(Identity Provider)身份提供者:负责认证用户的系统,如 Shibboleth/Okta/ADFS/KeyCloak 等等,用户所有登录行为都发生在 IDP。
- SP(Service Provider)服务提供者:用户访问的业务系统就是 SP,例如 Jira/Confluence 等等。
- Assertion(断言):IDP 发给 SP 的 XML 票据,包含用户信息/认证信息等等。
- Metadata(元数据):IDP 和 SP 的配置文件(XML 格式),IDP 和 SP 互换 metadata 即完成信任关系建立。
OpenLDAP
OpenLDAP 就是一个用来集中管理用户账号、密码、部门、组等信息的开源目录服务。
Shibboleth 需要一个用户目录来获取用户信息,而 OpenLDAP 正好就是这种目录服务,所以可以进行对接,即后者是前者的数据库。
配置前提
需要部署好 Shibboleth 和 OpenLDAP:
- OpenLDAP 部署可以参考:OpenLDAP Install
- Shibboleth 部署可以参考:Shibboleth Install
这里 Shibboleth 通过容器部署。
Shibboleth 部署
通过容器启动 Shibboleth,可以先将所需要的配置文件从容器中拷贝出来,修改后挂载并重新启动容器,主要的文件有:
1
2
3
4
5
6
7
8
9
| root@docker-test-0:~/shibboleth-idp# tree
.
├── access-control.xml
├── attribute-filter.xml
├── attribute-resolver.xml
├── ldap.properties
├── metadata-providers.xml
├── rancher-metadata.xml
└── secrets.properties
|
配置 access-control.xml,准入哪些 IP 访问 Shibboleth:
1
2
3
4
| <entry key="AccessByIPAddress">
<bean id="AccessByIPAddress" parent="shibboleth.IPRangeAccessControl"
p:allowedRanges="#{ {'127.0.0.1/32', '172.16.16.11/32', '172.16.16.142/32', '172.16.16.140/32', '::1/128'} }" />
</entry>
|
配置 attribute-filter.xml,配置返回属性的权限:
1
2
3
4
5
6
7
8
9
10
11
12
13
|
<AttributeFilterPolicy id="anyone">
<PolicyRequirementRule xsi:type="ANY"/>
<AttributeRule attributeID="uid">
<PermitValueRule xsi:type="ANY"/>
</AttributeRule>
<AttributeRule attributeID="displayName" permitAny="true" />
<AttributeRule attributeID="givenName" permitAny="true"/>
<AttributeRule attributeID="entryDN" permitAny="true"/>
<AttributeRule attributeID="entryUUID" permitAny="true" />
<AttributeRule attributeID="memberOf" permitAny="true" />
</AttributeFilterPolicy>
|
配置 attribute-resolver.xml,定义 Shibboleth 认证返回的属性信息:
1
2
3
4
5
6
7
8
9
10
11
12
13
14
15
16
17
18
19
20
21
22
23
24
25
26
27
28
29
30
31
32
33
34
35
36
37
38
39
40
41
42
43
44
45
46
47
48
49
50
51
52
53
54
55
56
57
58
59
60
61
62
63
64
65
66
67
|
<AttributeDefinition xsi:type="Simple" id="uid">
<InputDataConnector ref="myLDAP" attributeNames="uid"/>
<AttributeEncoder xsi:type="SAML1String" name="urn:mace:dir:attribute-def:uid" encodeType="false" />
<AttributeEncoder xsi:type="SAML2String" name="urn:oid:0.9.2342.19200300.100.1.1" friendlyName="uid" encodeType="false" />
</AttributeDefinition>
<AttributeDefinition xsi:type="Simple" id="surname">
<InputDataConnector ref="myLDAP" attributeNames="sn"/>
<AttributeEncoder xsi:type="SAML1String" name="urn:mace:dir:attribute-def:sn" encodeType="false" />
<AttributeEncoder xsi:type="SAML2String" name="urn:oid:2.5.4.4" friendlyName="sn" encodeType="false" />
</AttributeDefinition>
<AttributeDefinition xsi:type="Simple" id="givenName">
<InputDataConnector ref="myLDAP" attributeNames="givenName"/>
<AttributeEncoder xsi:type="SAML1String" name="urn:mace:dir:attribute-def:givenName" encodeType="false" />
<AttributeEncoder xsi:type="SAML2String" name="urn:oid:2.5.4.42" friendlyName="givenName" encodeType="false" />
</AttributeDefinition>
<AttributeDefinition xsi:type="Simple" id="displayName">
<InputDataConnector ref="myLDAP" attributeNames="displayName"/>
<AttributeEncoder xsi:type="SAML1String" name="urn:mace:dir:attribute-def:displayName" encodeType="false" />
<AttributeEncoder xsi:type="SAML2String" name="urn:oid:2.16.840.1.113730.3.1.241" friendlyName="displayName" encodeType="false" />
</AttributeDefinition>
<AttributeDefinition xsi:type="Simple" id="memberOf">
<InputDataConnector ref="myLDAP" attributeNames="memberOf"/>
<AttributeEncoder xsi:type="SAML1String" name="urn:mace:dir:attribute-def:memberOf" encodeType="false" />
<AttributeEncoder xsi:type="SAML2String" name="urn:oid:2.16.840.1.113730.3.1.244" friendlyName="memberOf" encodeType="false" />
</AttributeDefinition>
<AttributeDefinition xsi:type="Simple" id="entryDN">
<InputDataConnector ref="myLDAP" attributeNames="entryDN"/>
<AttributeEncoder xsi:type="SAML1String" name="urn:mace:dir:attribute-def:entryDN" encodeType="false" />
<AttributeEncoder xsi:type="SAML2String" name="urn:oid:2.5.4.5" friendlyName="entryDN" encodeType="false" />
</AttributeDefinition>
<AttributeDefinition xsi:type="Simple" id="entryUUID">
<InputDataConnector ref="myLDAP" attributeNames="entryUUID"/>
<AttributeEncoder xsi:type="SAML1String" name="urn:mace:dir:attribute-def:entryUUID" encodeType="false" />
<AttributeEncoder xsi:type="SAML2String" name="urn:oid:2.5.4.6" friendlyName="entryUUID" encodeType="false" />
</AttributeDefinition>
<DataConnector id="myLDAP" xsi:type="LDAPDirectory"
ldapURL="%{idp.attribute.resolver.LDAP.ldapURL}"
baseDN="%{idp.attribute.resolver.LDAP.baseDN}"
principal="%{idp.attribute.resolver.LDAP.bindDN}"
principalCredential="%{idp.attribute.resolver.LDAP.bindDNCredential}"
useStartTLS="%{idp.attribute.resolver.LDAP.useStartTLS:true}"
connectTimeout="%{idp.attribute.resolver.LDAP.connectTimeout}"
responseTimeout="%{idp.attribute.resolver.LDAP.responseTimeout}">
<FilterTemplate>
<![CDATA[
%{idp.attribute.resolver.LDAP.searchFilter}
]]>
</FilterTemplate>
<ConnectionPool
minPoolSize="%{idp.pool.LDAP.minSize:3}"
maxPoolSize="%{idp.pool.LDAP.maxSize:10}"
blockWaitTime="%{idp.pool.LDAP.blockWaitTime:PT3S}"
validatePeriodically="%{idp.pool.LDAP.validatePeriodically:true}"
validateTimerPeriod="%{idp.pool.LDAP.validatePeriod:PT5M}"
expirationTime="%{idp.pool.LDAP.idleTime:PT10M}" />
<ReturnAttributes>%{idp.attribute.resolver.LDAP.returnAttributes}</ReturnAttributes>
</DataConnector>
|
配置 ldap.properties,配置 OpenLDAP 相关信息进行对接:
1
2
3
4
5
6
7
8
9
10
11
12
13
14
15
16
17
18
19
20
| idp.authn.LDAP.authenticator = bindSearchAuthenticator
idp.authn.LDAP.ldapURL = ldap://172.16.16.142:389
idp.authn.LDAP.useStartTLS = false
idp.authn.LDAP.returnAttributes = cn,uid,sn,displayName,givenName,memberOf,entryDN,entryUUID
idp.authn.LDAP.baseDN = ou=shenzhen,dc=rancher,dc=work
idp.authn.LDAP.subtreeSearch = true
idp.authn.LDAP.userFilter = (&(objectclass=inetOrgPerson)(uid={user}))
idp.authn.LDAP.bindDN = cn=admin,dc=rancher,dc=work
idp.authn.LDAP.dnFormat = uid=warner chen,ou=shenzhen,dc=rancher,dc=work
idp.attribute.resolver.LDAP.ldapURL = %{idp.authn.LDAP.ldapURL}
idp.attribute.resolver.LDAP.connectTimeout = %{idp.authn.LDAP.connectTimeout:PT3S}
idp.attribute.resolver.LDAP.responseTimeout = %{idp.authn.LDAP.responseTimeout:PT3S}
idp.attribute.resolver.LDAP.connectionStrategy = %{idp.authn.LDAP.connectionStrategy:ACTIVE_PASSIVE}
idp.attribute.resolver.LDAP.baseDN = %{idp.authn.LDAP.baseDN:undefined}
idp.attribute.resolver.LDAP.bindDN = %{idp.authn.LDAP.bindDN:undefined}
idp.attribute.resolver.LDAP.useStartTLS = %{idp.authn.LDAP.useStartTLS:true}
idp.attribute.resolver.LDAP.startTLSTimeout = %{idp.authn.LDAP.startTLSTimeout:PT3S}
idp.attribute.resolver.LDAP.trustCertificates = %{idp.authn.LDAP.trustCertificates:undefined}
idp.attribute.resolver.LDAP.searchFilter = (uid=$resolutionContext.principal)
idp.attribute.resolver.LDAP.returnAttributes = %{idp.authn.LDAP.returnAttributes}
|
配置 secrets.properties,配置密码认证信息:
1
2
3
4
| idp.sealer.storePassword = idpsealerpwd
idp.sealer.keyPassword = idpsealerpwd
idp.authn.LDAP.bindDNCredential = password
idp.attribute.resolver.LDAP.bindDNCredential = %{idp.authn.LDAP.bindDNCredential:undefined}
|
配置 metadata-providers.xml,配置对接 metadata,在原有的配置增加下面的内容:
1
2
| <MetadataProvider id="LocalEntityMetadata" xsi:type="FilesystemMetadataProvider"
metadataFile="/opt/shibboleth-idp/metadata/rancher-metadata.xml"/>
|
配置 rancher-metadata.xml,需要从 Rancher 中下载:
1
| curl --insecure https://<server-url>/v1-saml/shibboleth/saml/metadata -o rancher-metadata.xml
|
启动 Shibboleth 容器:
1
2
3
4
5
6
7
8
9
| docker run -d --name shibboleth-idp -p 8080:8080 \
-v /root/shibboleth-idp/access-control.xml:/opt/shibboleth-idp/conf/access-control.xml \
-v /root/shibboleth-idp/attribute-filter.xml:/opt/shibboleth-idp/conf/attribute-filter.xml \
-v /root/shibboleth-idp/attribute-resolver.xml:/opt/shibboleth-idp/conf/attribute-resolver.xml \
-v /root/shibboleth-idp/ldap.properties:/opt/shibboleth-idp/conf/ldap.properties \
-v /root/shibboleth-idp/secrets.properties:/opt/shibboleth-idp/credentials/secrets.properties \
-v /root/shibboleth-idp/rancher-metadata.xml:/opt/shibboleth-idp/metadata/rancher-metadata.xml \
-v /root/shibboleth-idp/metadata-providers.xml:/opt/shibboleth-idp/conf/metadata-providers.xml \
harbor.warnerchen.com/klaalo/shibboleth-idp:4.3.1
|
这时候需要部署一个 Nginx 作为反向代理,准备配置文件:
1
2
3
4
5
6
7
8
9
10
11
12
13
14
15
16
17
18
19
20
21
22
23
24
25
26
| cat <<EOF > /root/nginx/default.conf
server {
listen 80;
server_name idp.example.org;
location / {
return 301 https://$host$request_uri;
}
}
server {
listen 443 ssl;
server_name idp.example.org;
ssl_certificate /etc/nginx/ssl/myservice.cert;
ssl_certificate_key /etc/nginx/ssl/myservice.key;
location / {
proxy_pass http://172.16.16.142:8080;
proxy_set_header Host $host;
proxy_set_header X-Real-IP $remote_addr;
proxy_set_header X-Forwarded-For $proxy_add_x_forwarded_for;
proxy_set_header X-Forwarded-Proto $scheme;
}
}
EOF
|
准备证书:
1
| openssl req -x509 -newkey rsa:2048 -keyout myservice.key -out myservice.cert -days 365 -nodes -subj "/CN=idp.example.org"
|
启动 Nginx:
1
2
3
4
5
6
7
| docker run -d \
--name nginx \
-v /root/nginx/default.conf:/etc/nginx/conf.d/default.conf \
-v /root/nginx/ssl:/etc/nginx/ssl \
-p 80:80 \
-p 443:443 \
harbor.warnerchen.com/library/nginx:mainline
|
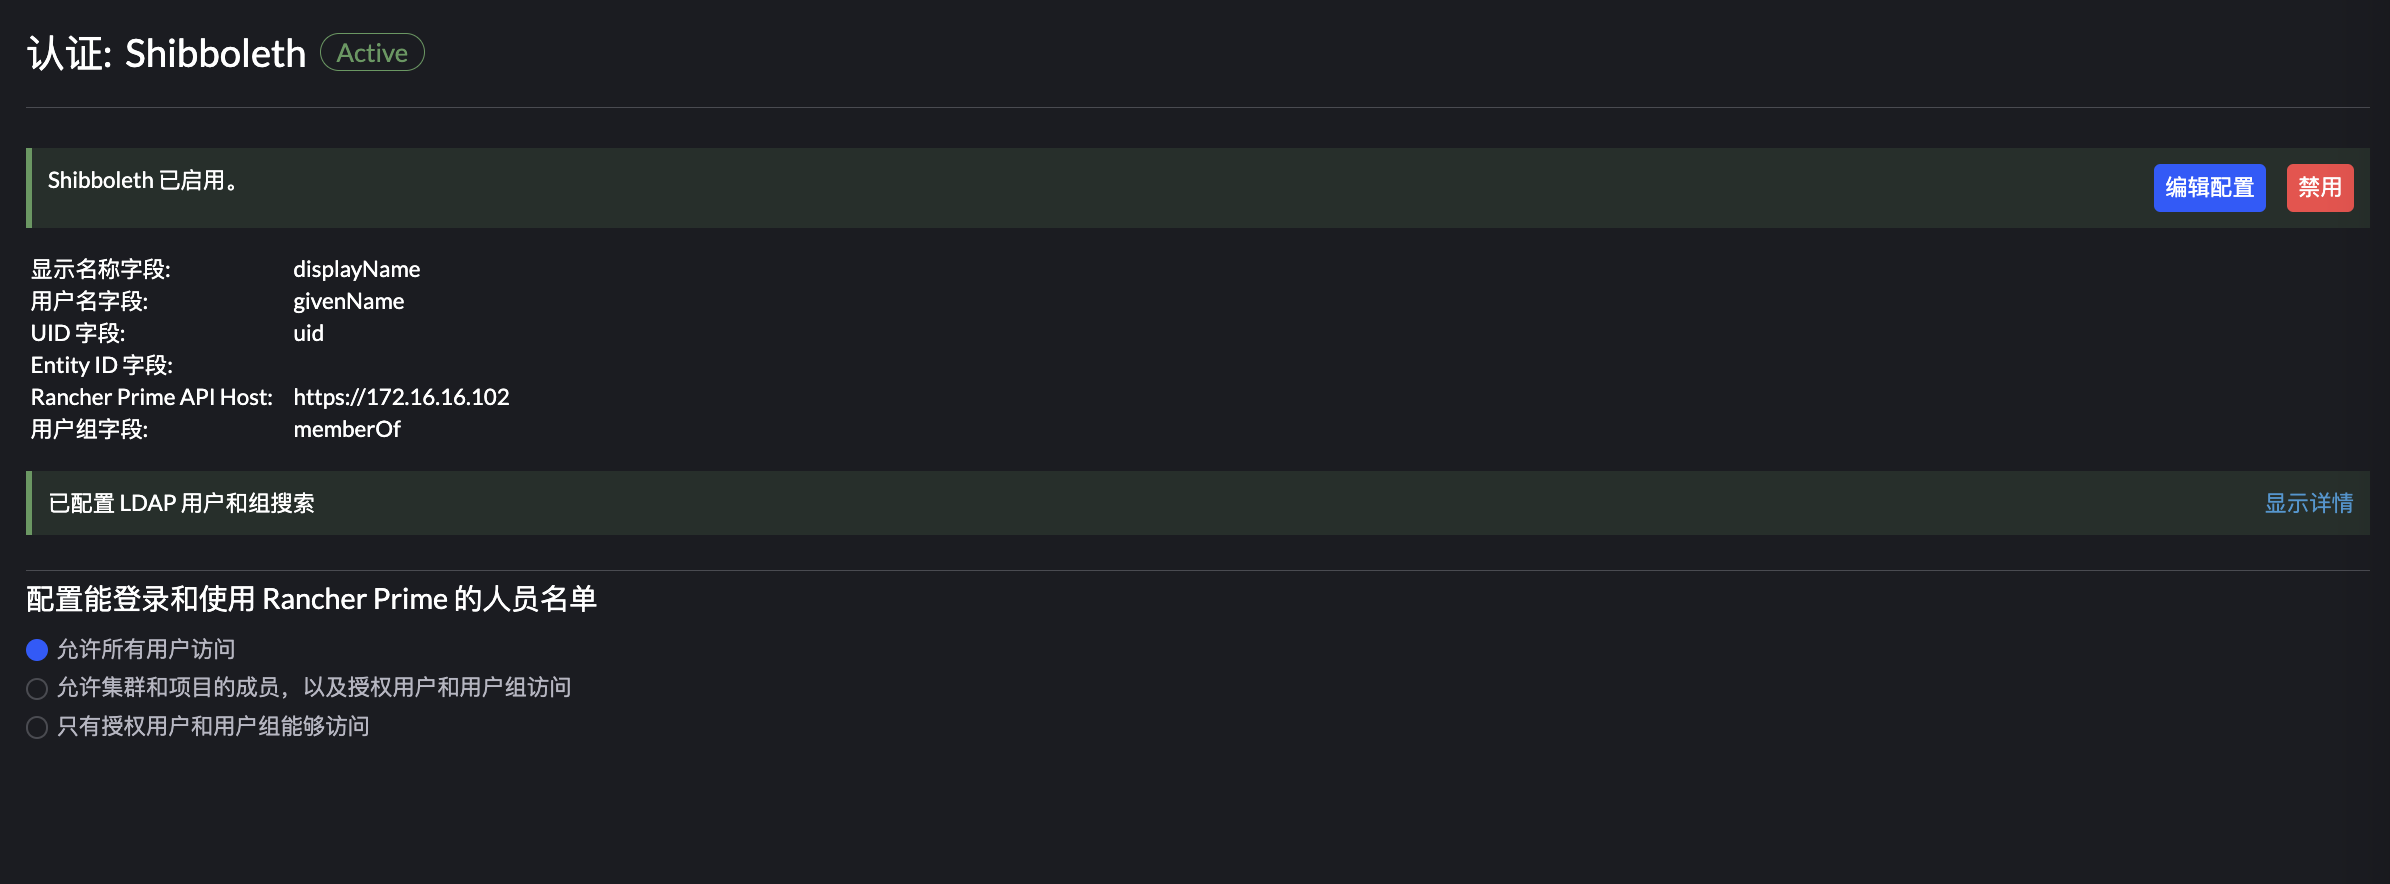
Rancher 对接 Shibboleth
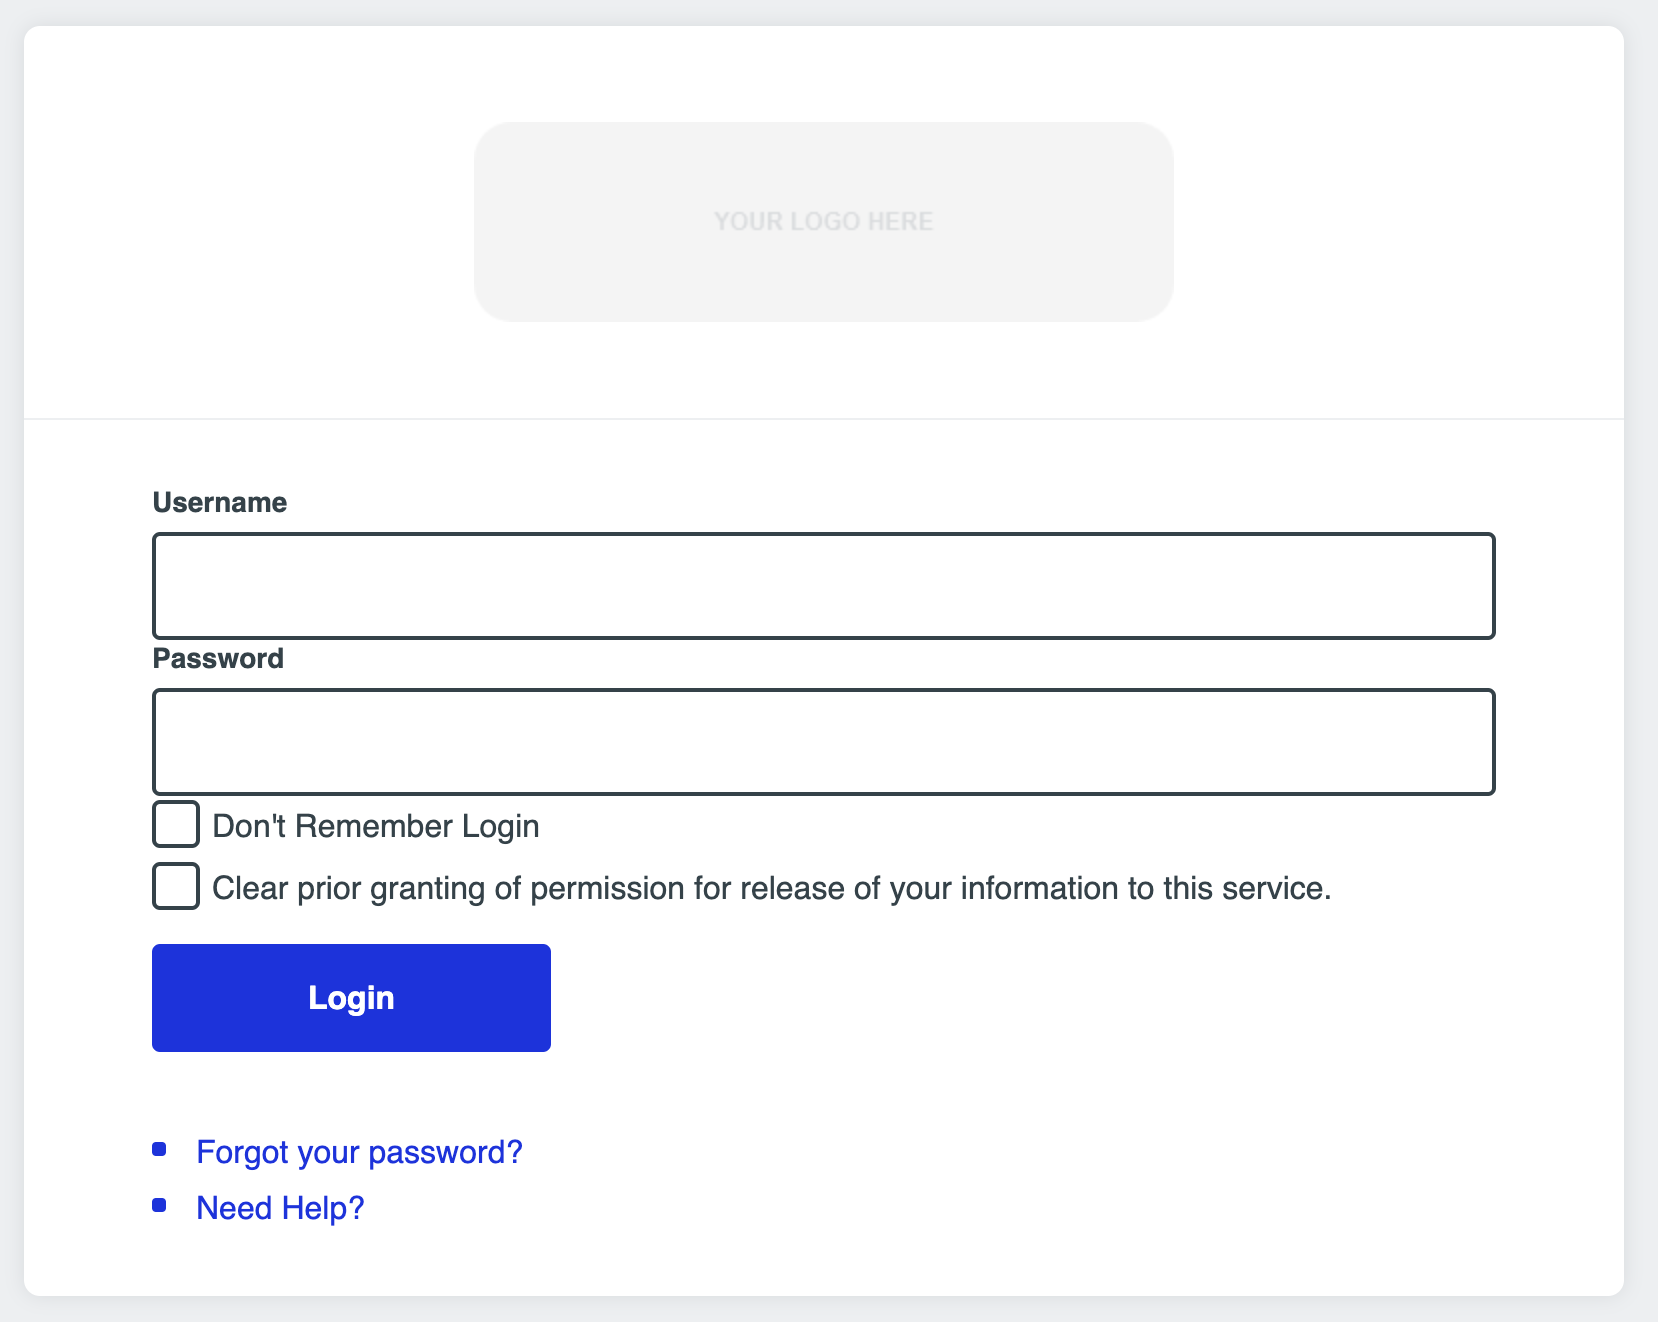
如图,证书和私钥可以用前面生成的,XML 元数据需要从 Shibboleth 的 /opt/shibboleth-idp/metadata/idp-metadata.xml 获取:

保存后会弹窗,需要进行登陆认证,直接使用 OpenLDAP 的账号密码即可,用户名只需要填 uid。
于此步骤中输入的凭据相关的 IDP 用户将映射到本地主体(admin)帐户并在 Rancher Prime Manager 中分配系统管理员权限,所以查看 local admin 账户可以看到:
1
2
3
4
5
6
7
8
9
10
| apiVersion: management.cattle.io/v3
description: ''
displayName: Default Admin
kind: User
...
principalIds:
- local://user-xdvhb
- shibboleth_user://warner chen
...
username: xxx
|
Rancher 对接 Shibboleth + OpenLDAP 实现用户组授权
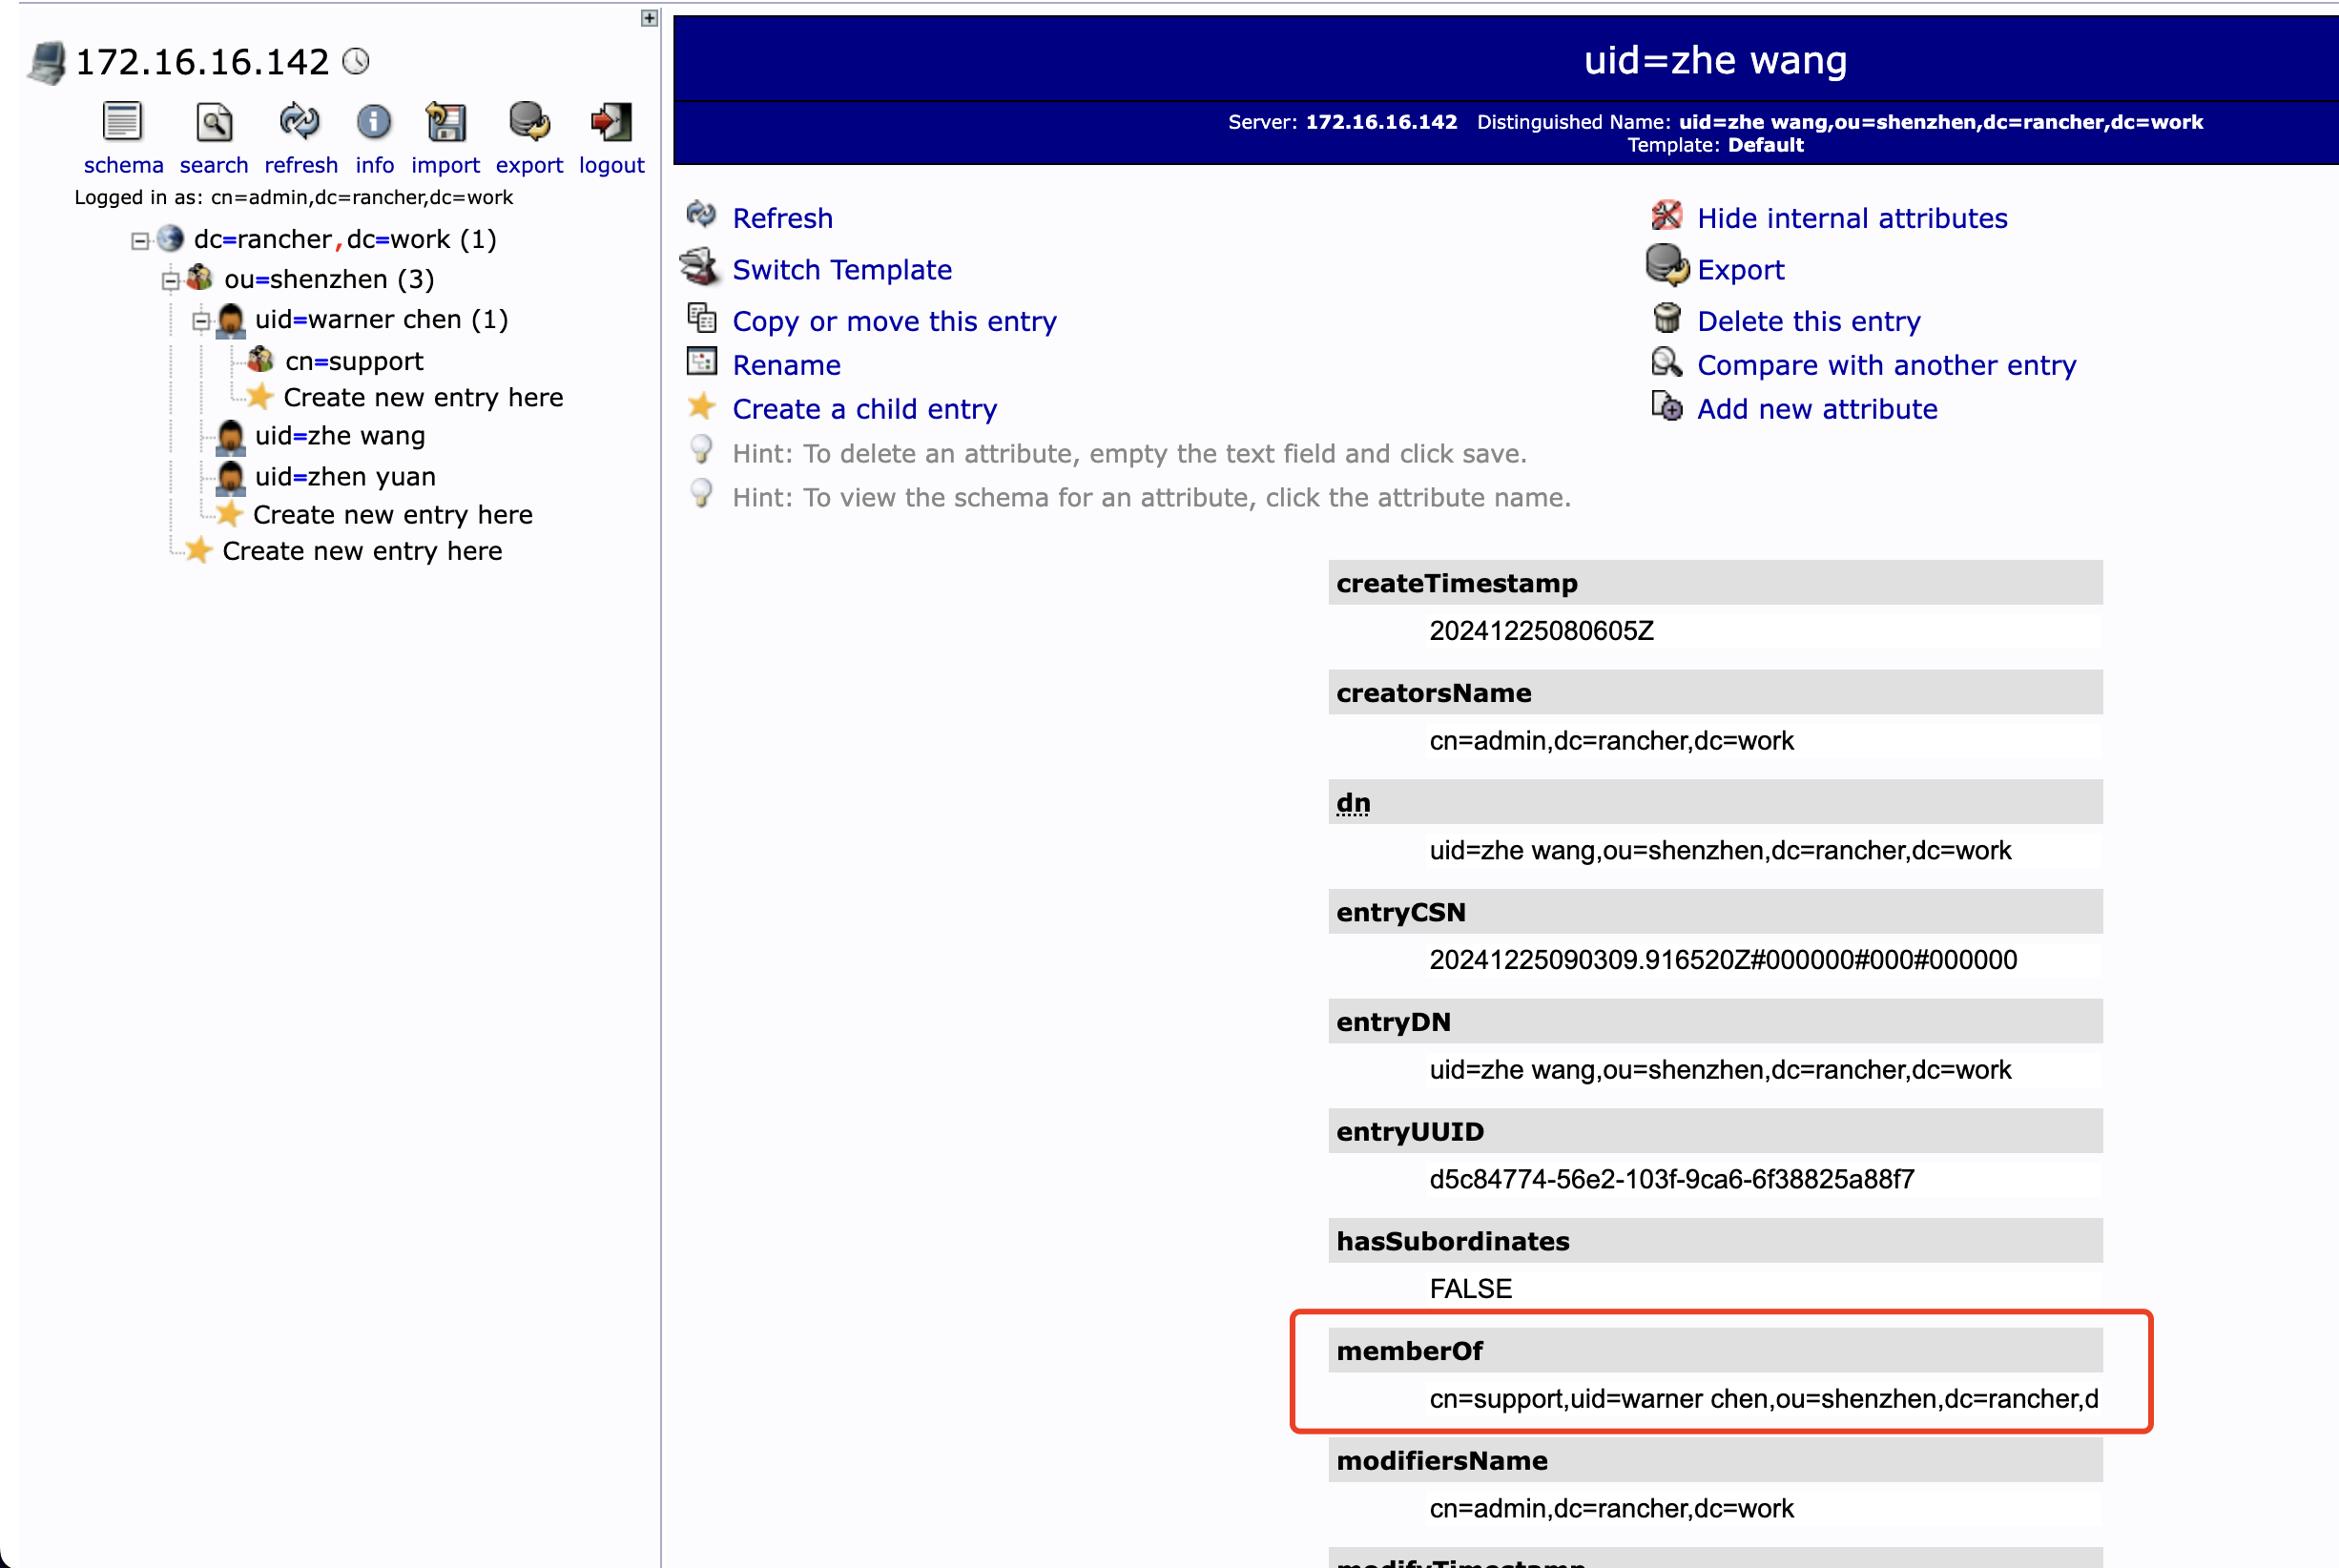
在配置之前 OpenLDAP 需要开启 memberOf 属性,创建用户组并将用户添加到组中,配置方法可以参考:配置用户和用户组
配置后,用户的隐藏信息能够看到所属组:
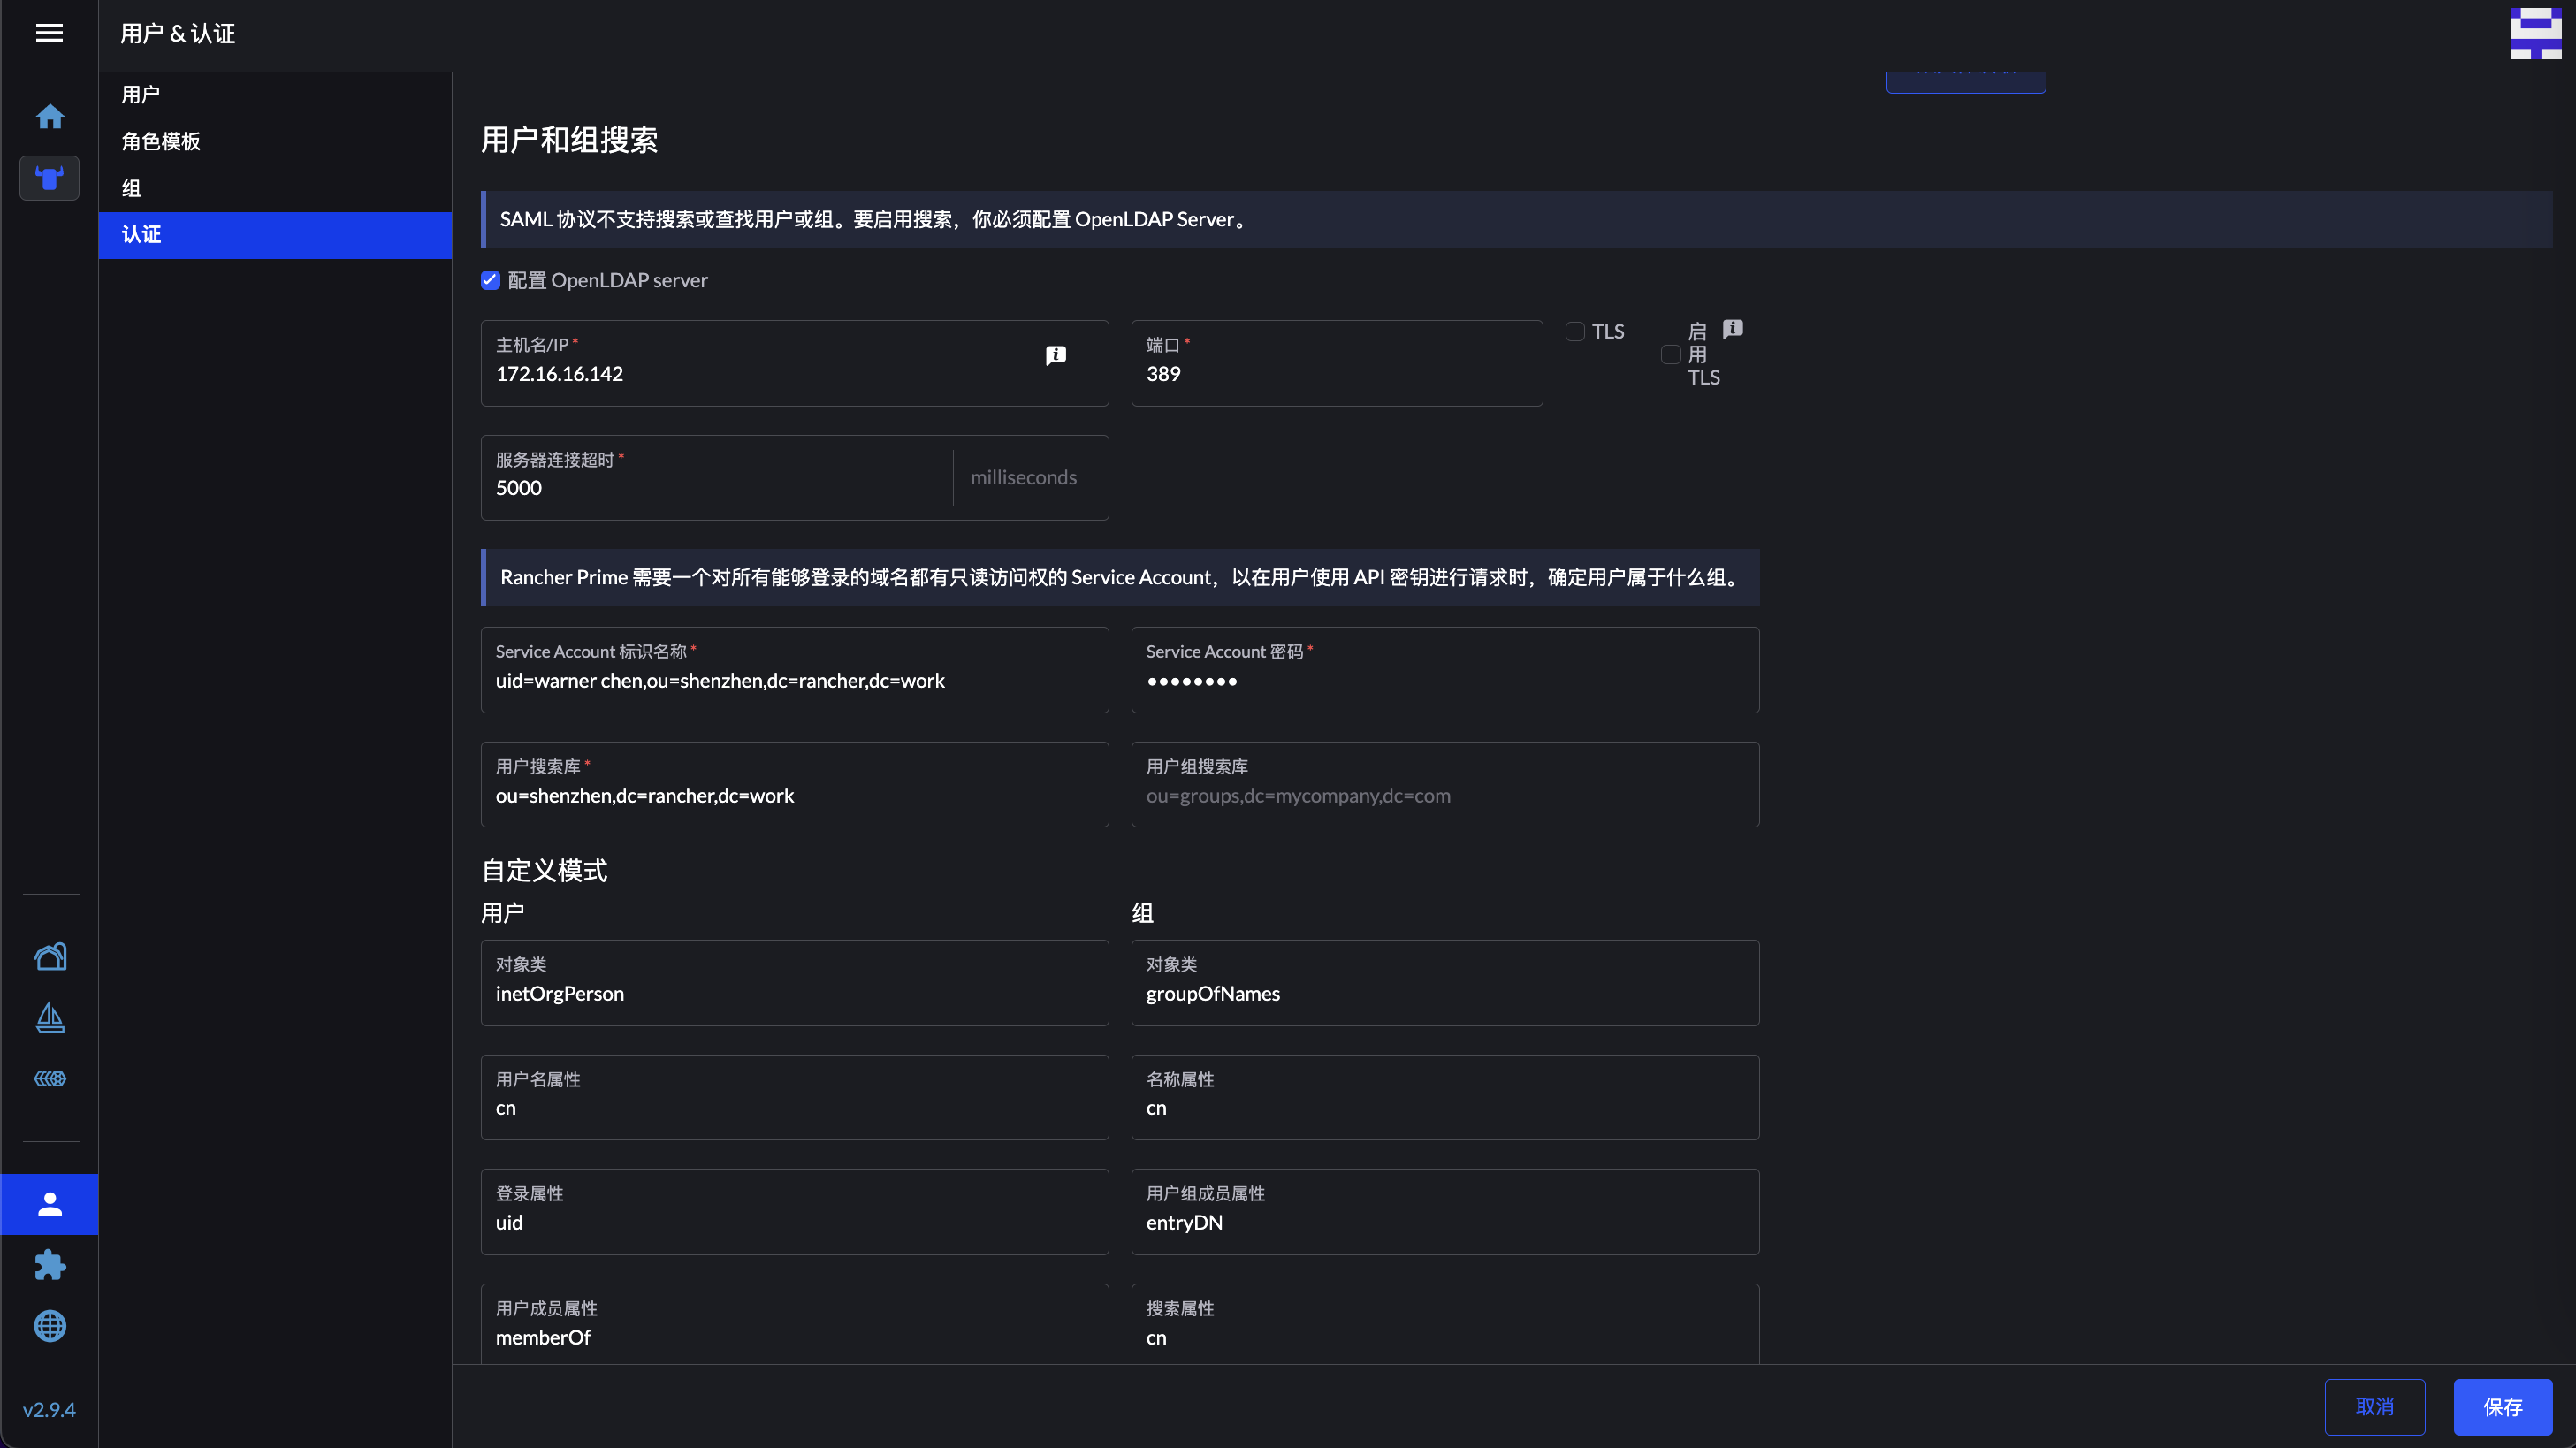
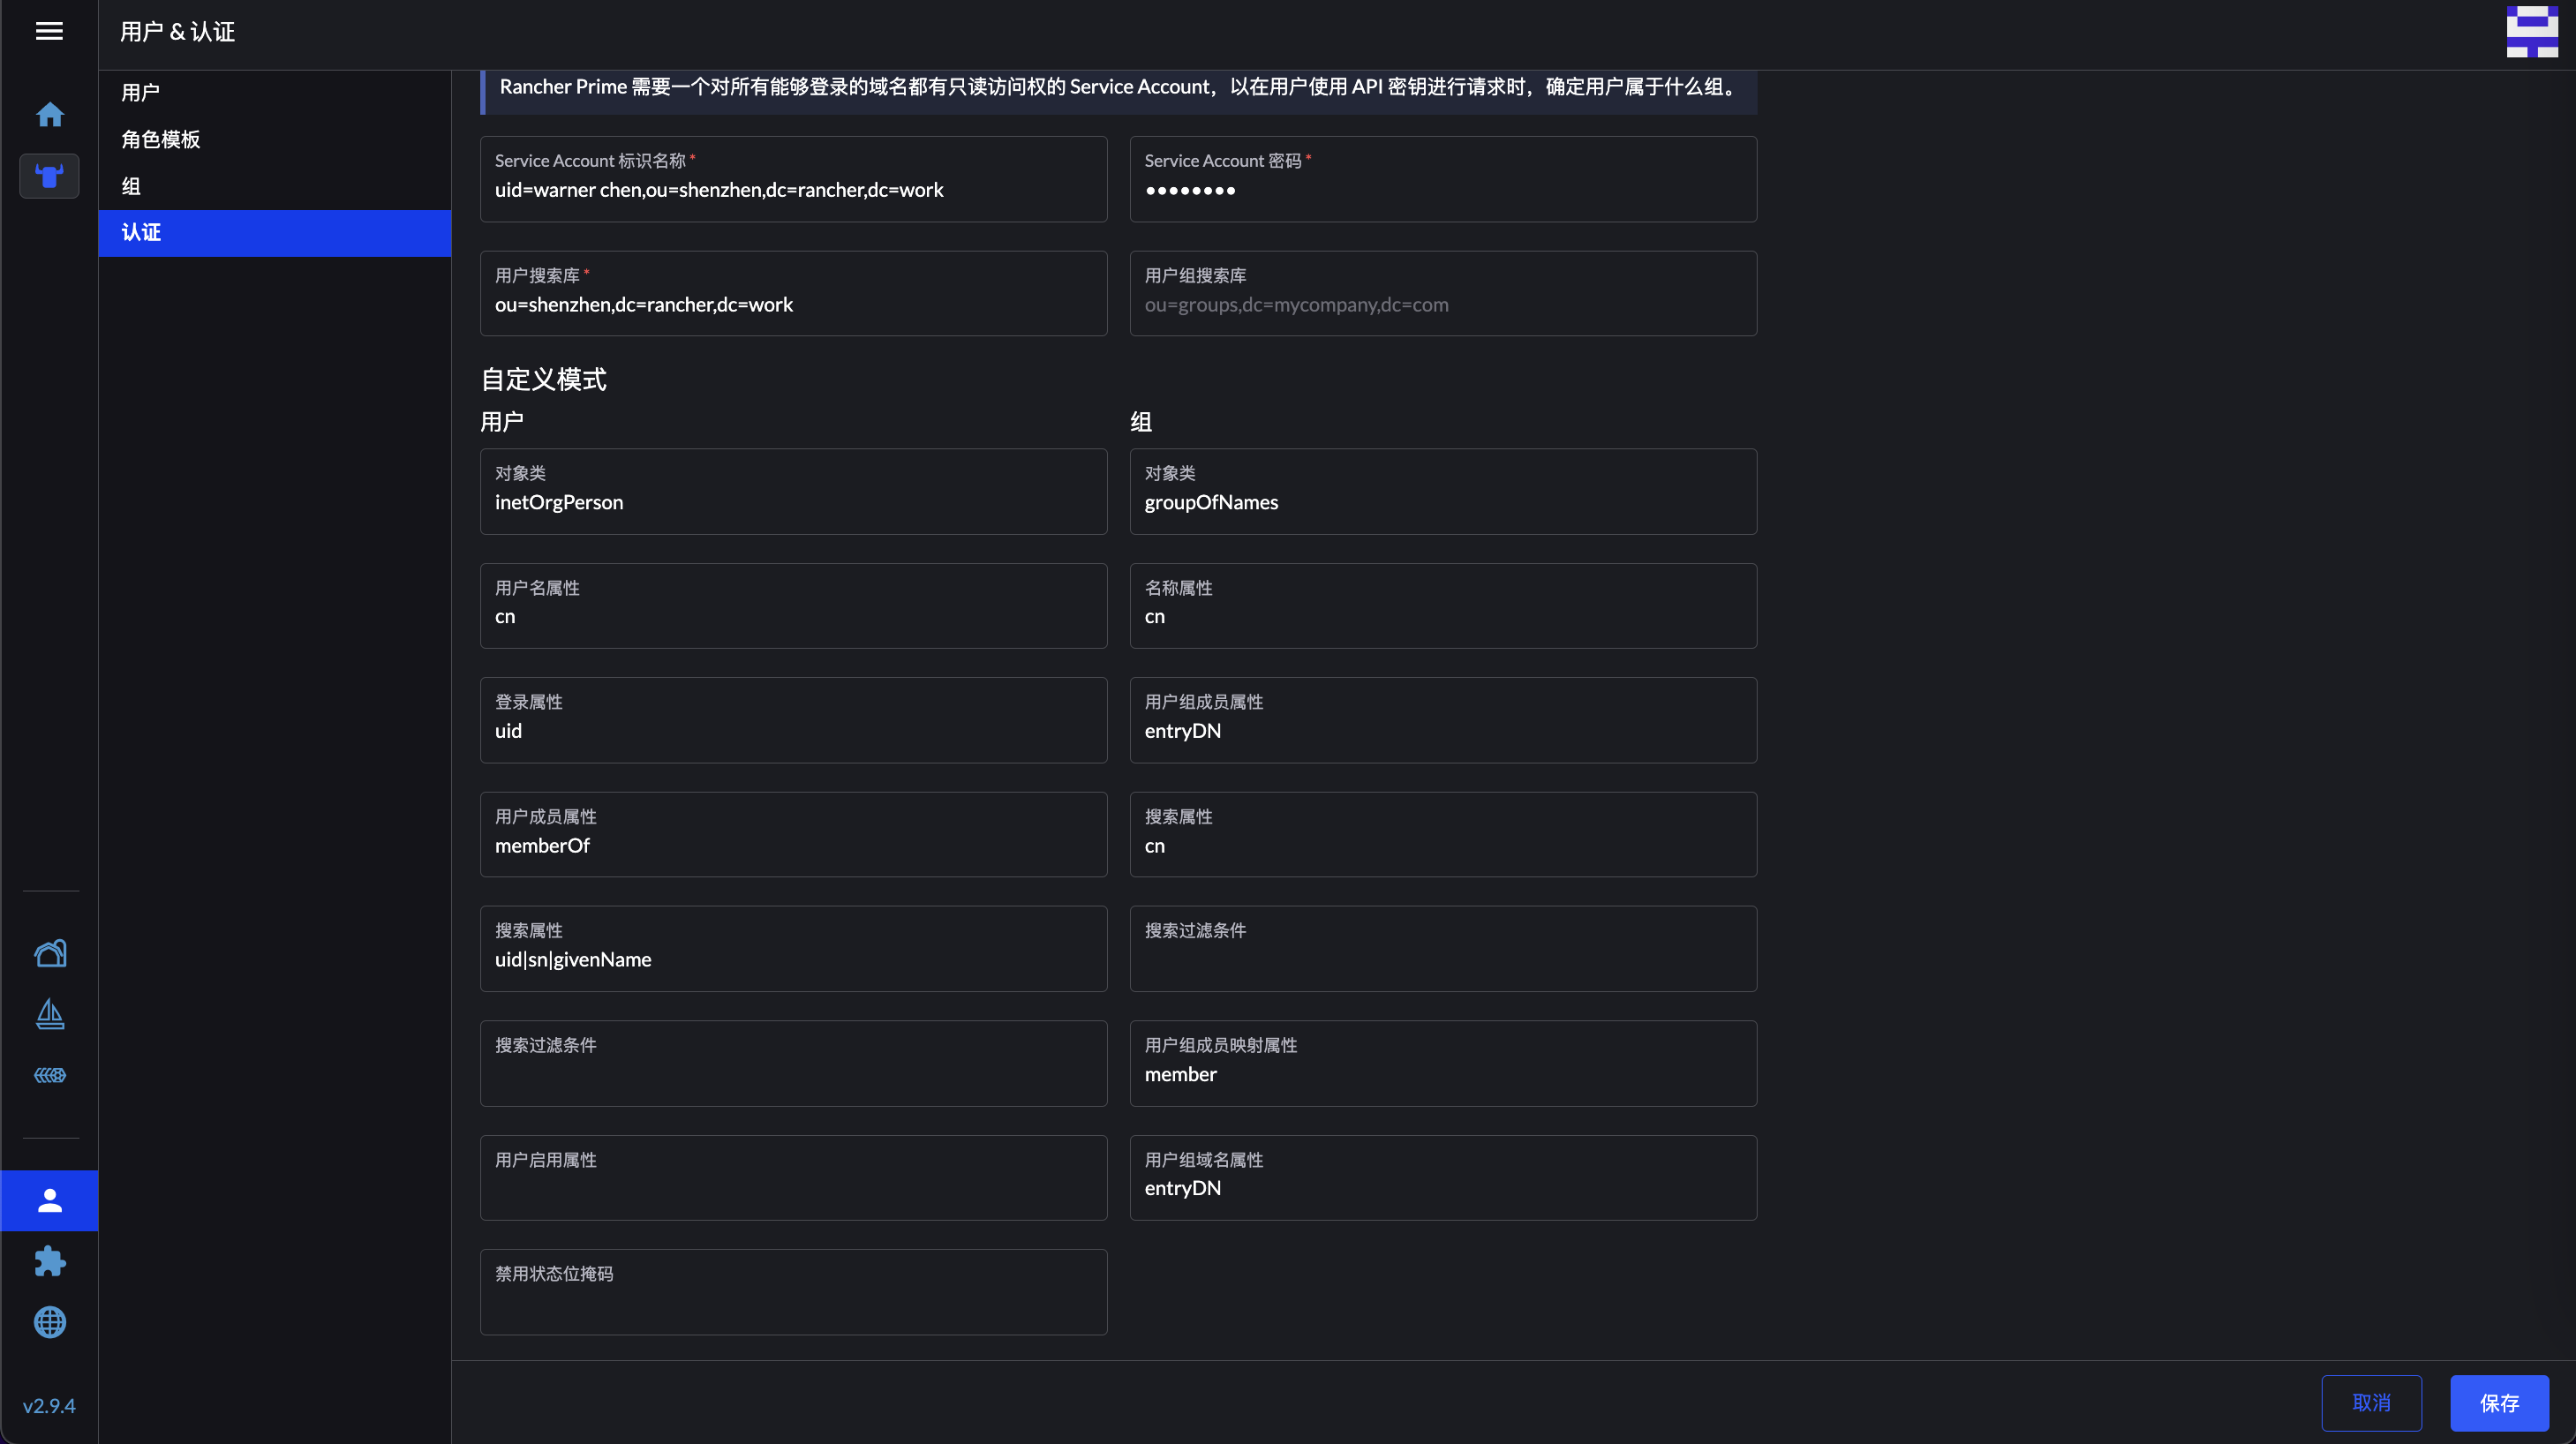
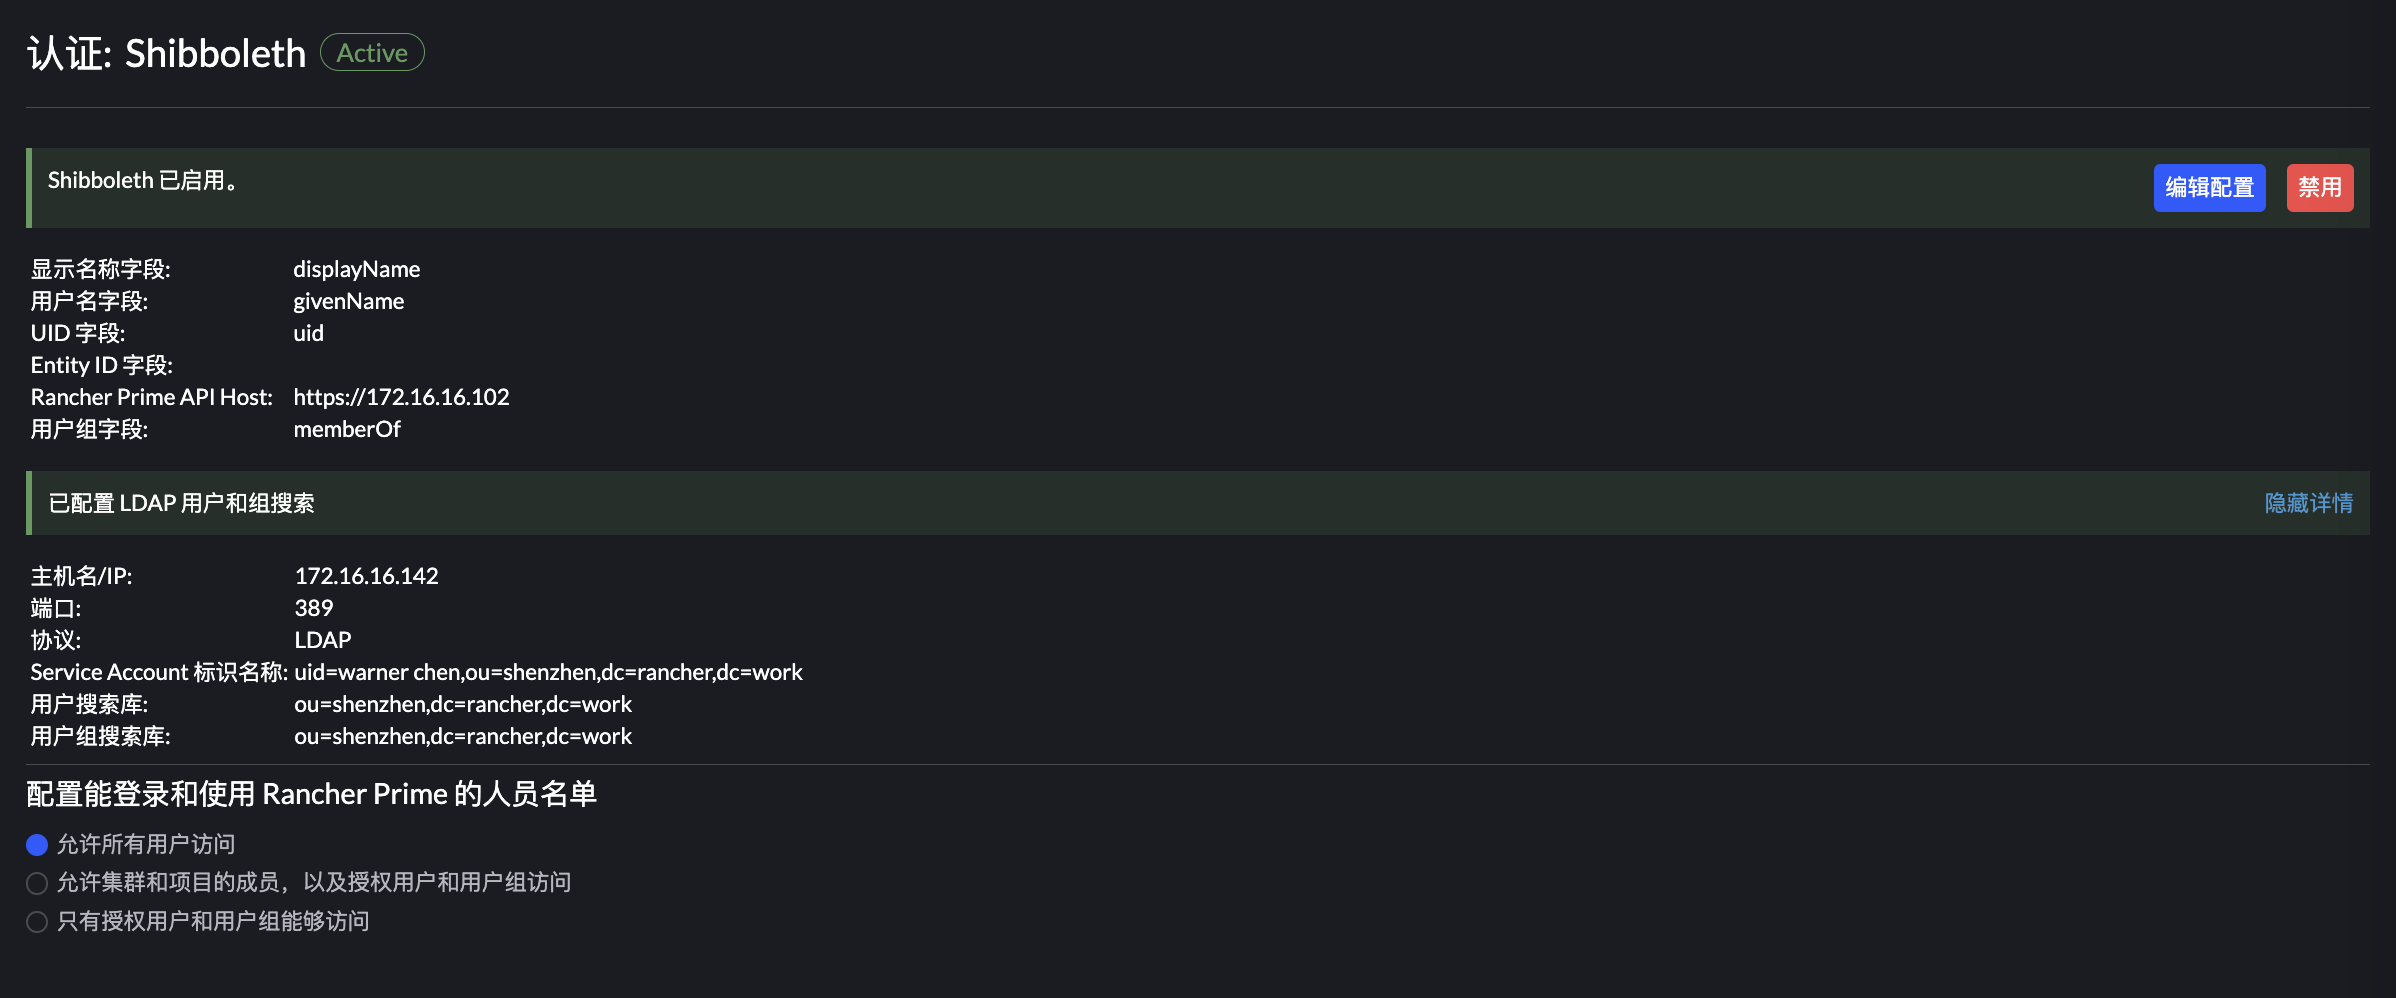
然后 Rancher 需要配置用户组搜索库,这里的 DN 根据实际情况填写:
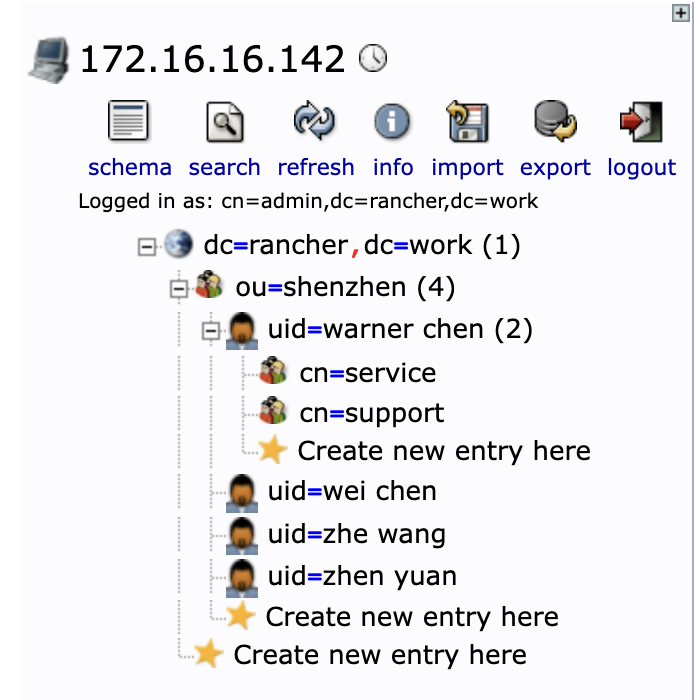
OpenLDAP 目录结构为:
对接完成后,即可通过组进行授权:
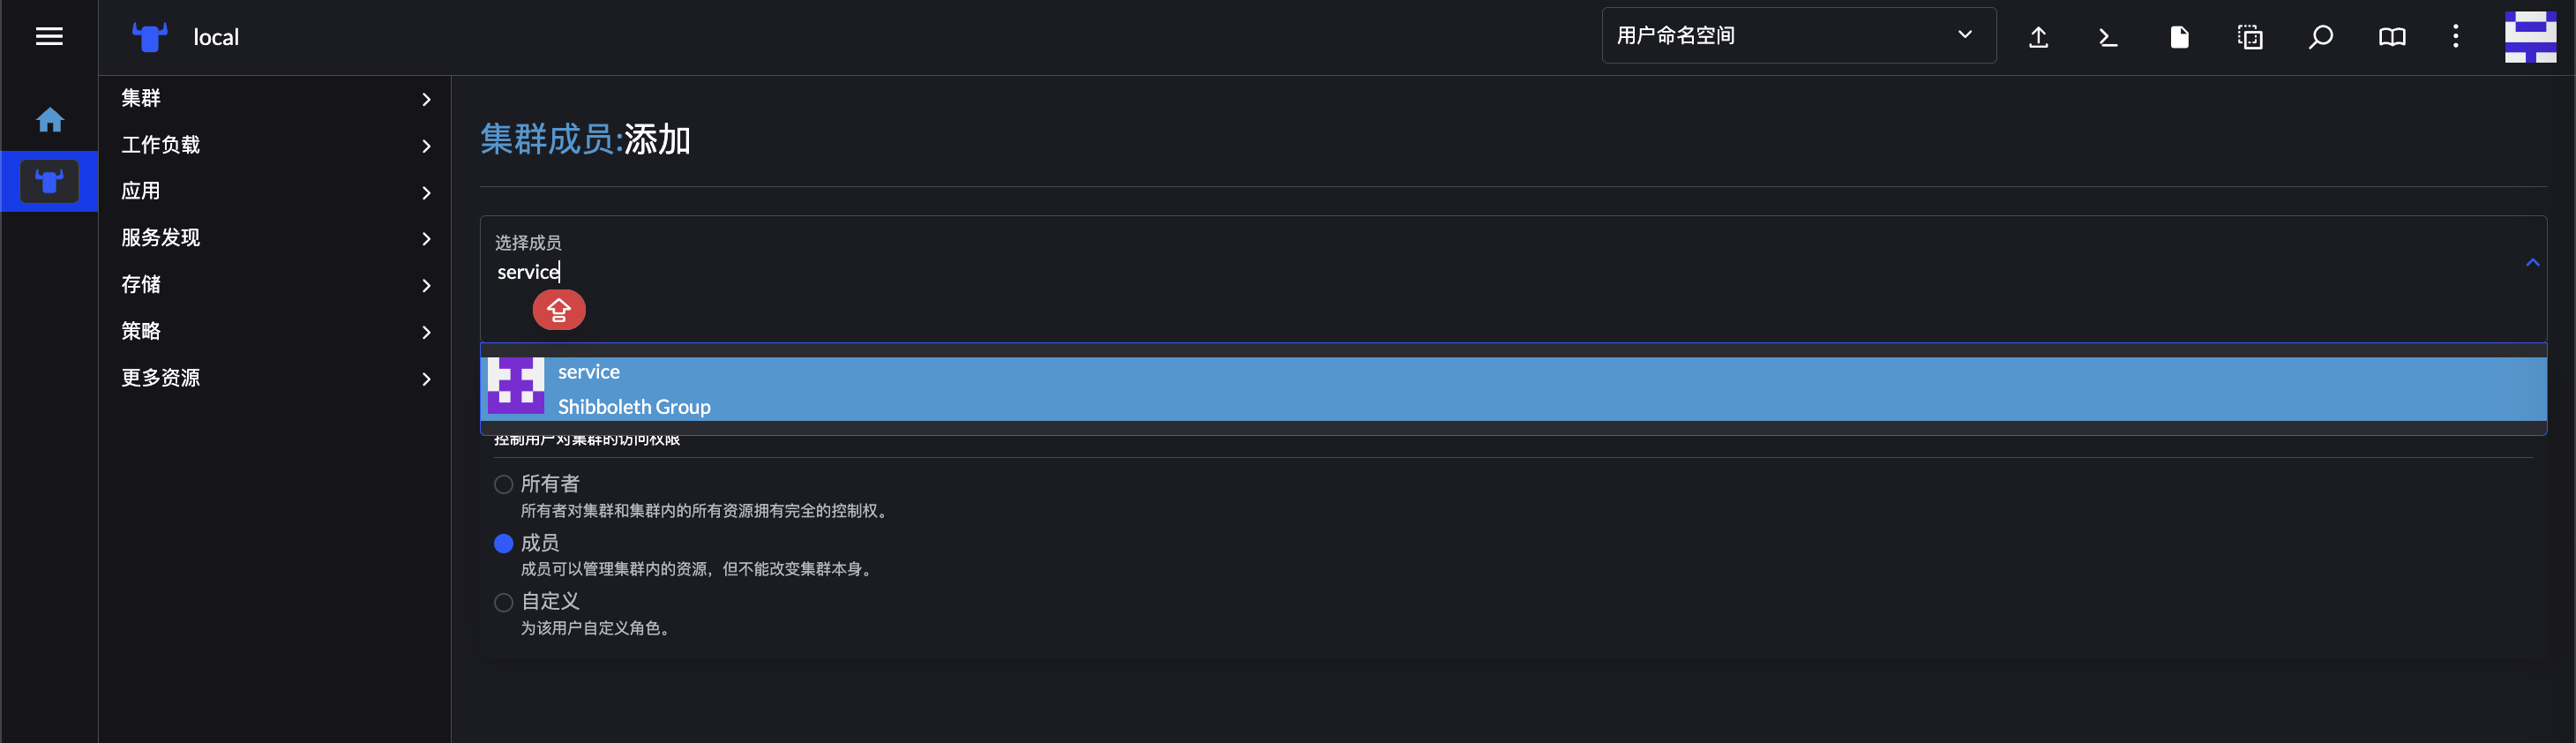
授权后,组内用户登录 Rancher,即可以到对应的资源:
