GPU 节点安装 Nvidia 驱动 官方文档:NVIDIA CUDA Installation Guide for Linux
安装前准备 查看节点是否存在可用的 GPU:
1
2
root@gpu-0:~# lspci | grep -i nvidia 03:00.0 3D controller: NVIDIA Corporation GP104GL [Tesla P4] (rev a1)
安装依赖项:
1
2
apt update apt -y install gcc make
Nouveau 是开源 NVIDIA 驱动,会与 NVIDIA 官方闭源驱动冲突,因此需要禁用:
1
2
3
4
echo -e "blacklist nouveau\noptions nouveau modeset=0" | sudo tee /etc/modprobe.d/blacklist-nouveau.confupdate-initramfs -u reboot lsmod | grep nouveau
关闭 Secure Boot 并重启节点:
1 2 3 mokutil --disable-validation mokutil --sb-state
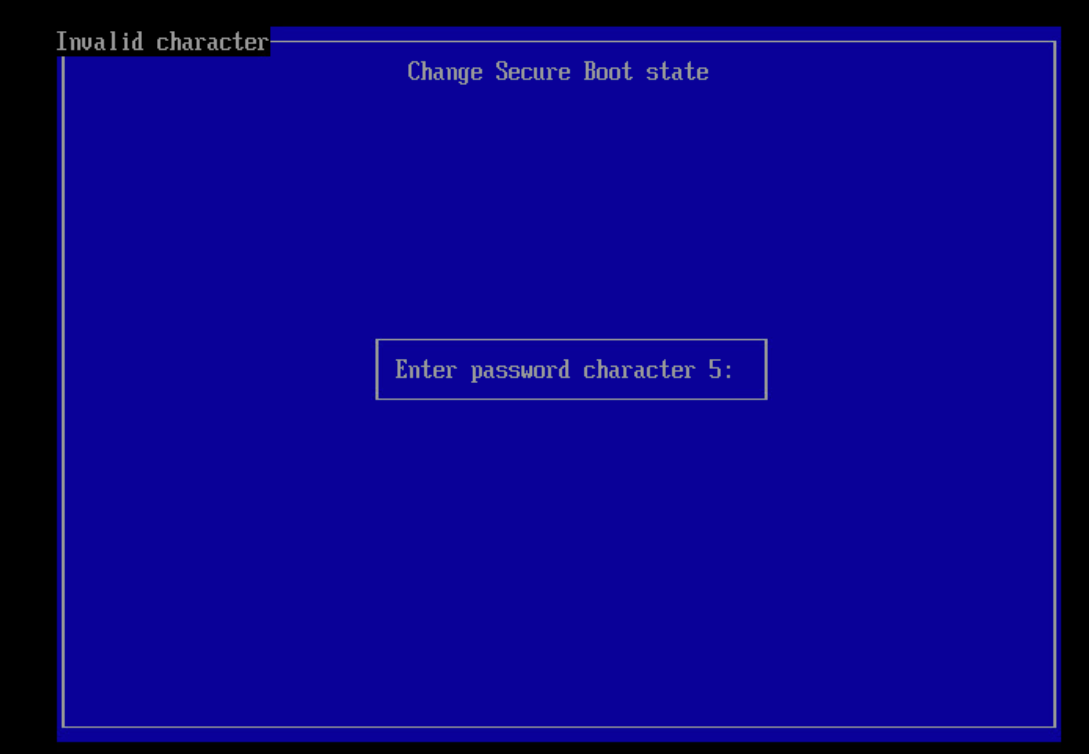
重启后会进入蓝色的 MOK Manager / Shim UEFI key management 界面。此时需要选择 Change Secure Boot state ,然后根据提示输入密码的第 N 位,例如下图表示需要输入密码的第 5 位:
通过 Nvidia 官方 .run 程序安装驱动 下载对应的安装程序:Nvidia Driver Downloads
1 wget -c "https://cn.download.nvidia.com/tesla/570.86.15/NVIDIA-Linux-x86_64-570.86.15.run"
执行安装:
1
2
3
chmod +x NVIDIA-Linux-x86_64-570.86.15.run./NVIDIA-Linux-x86_64-570.86.15.run reboot
如果执行 nvidia-smi 时出现以下错误:
No devices were foundNVIDIA-SMI has failed because it couldn't communicate with the NVIDIA driver. Make sure that the latest NVIDIA driver is installed and running.
可以尝试通过以下方式处理:
1
2
3
4
apt -y install dkms VERSION=$(ls /usr/src | awk -F - '/nvidia/{ print $2 }' ) dkms install -m nvidia -v $VERSION reboot
重启节点后会进入 Perform MOK management 页面,选择 EnrollMOK 并输入密码,完成后节点会再次重启。
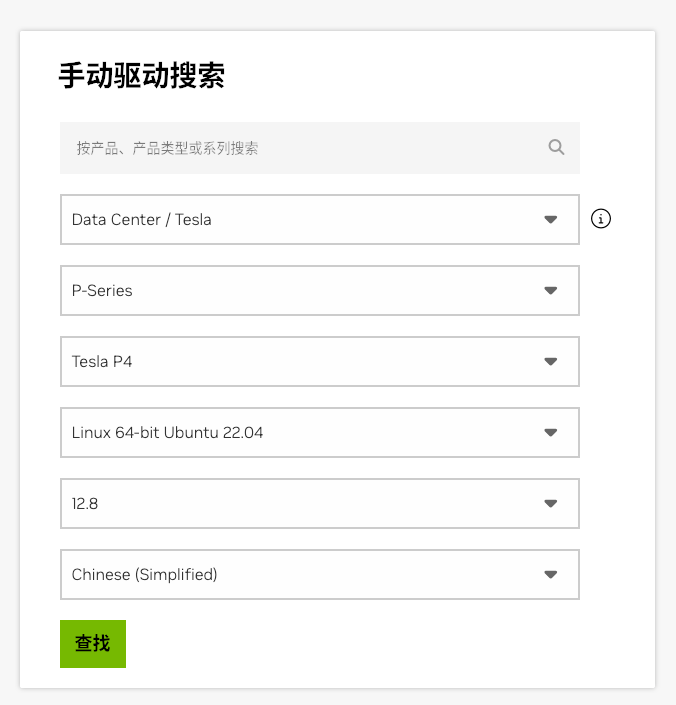
通过 Nvidia 官方 Local Repo 安装驱动 在官网下载对应的 Local Repo 文件:
https://www.nvidia.cn/drivers/lookup/
1
2
3
dpkg -i nvidia-driver-local-repo-ubuntu2204-570.86.15_1.0-1_amd64.deb cp /var/nvidia-driver-local-repo-ubuntu2204-570.86.15/nvidia-driver-local-081EF1BD-keyring.gpg /usr/share/keyrings/apt update
查看可用驱动版本:
1 apt list | grep nvidia-driver
安装驱动:
1
2
apt -y install nvidia-driver-570 reboot
重启节点后会进入 Perform MOK management 页面,选择 EnrollMOK 并输入密码,完成后节点会再次重启。
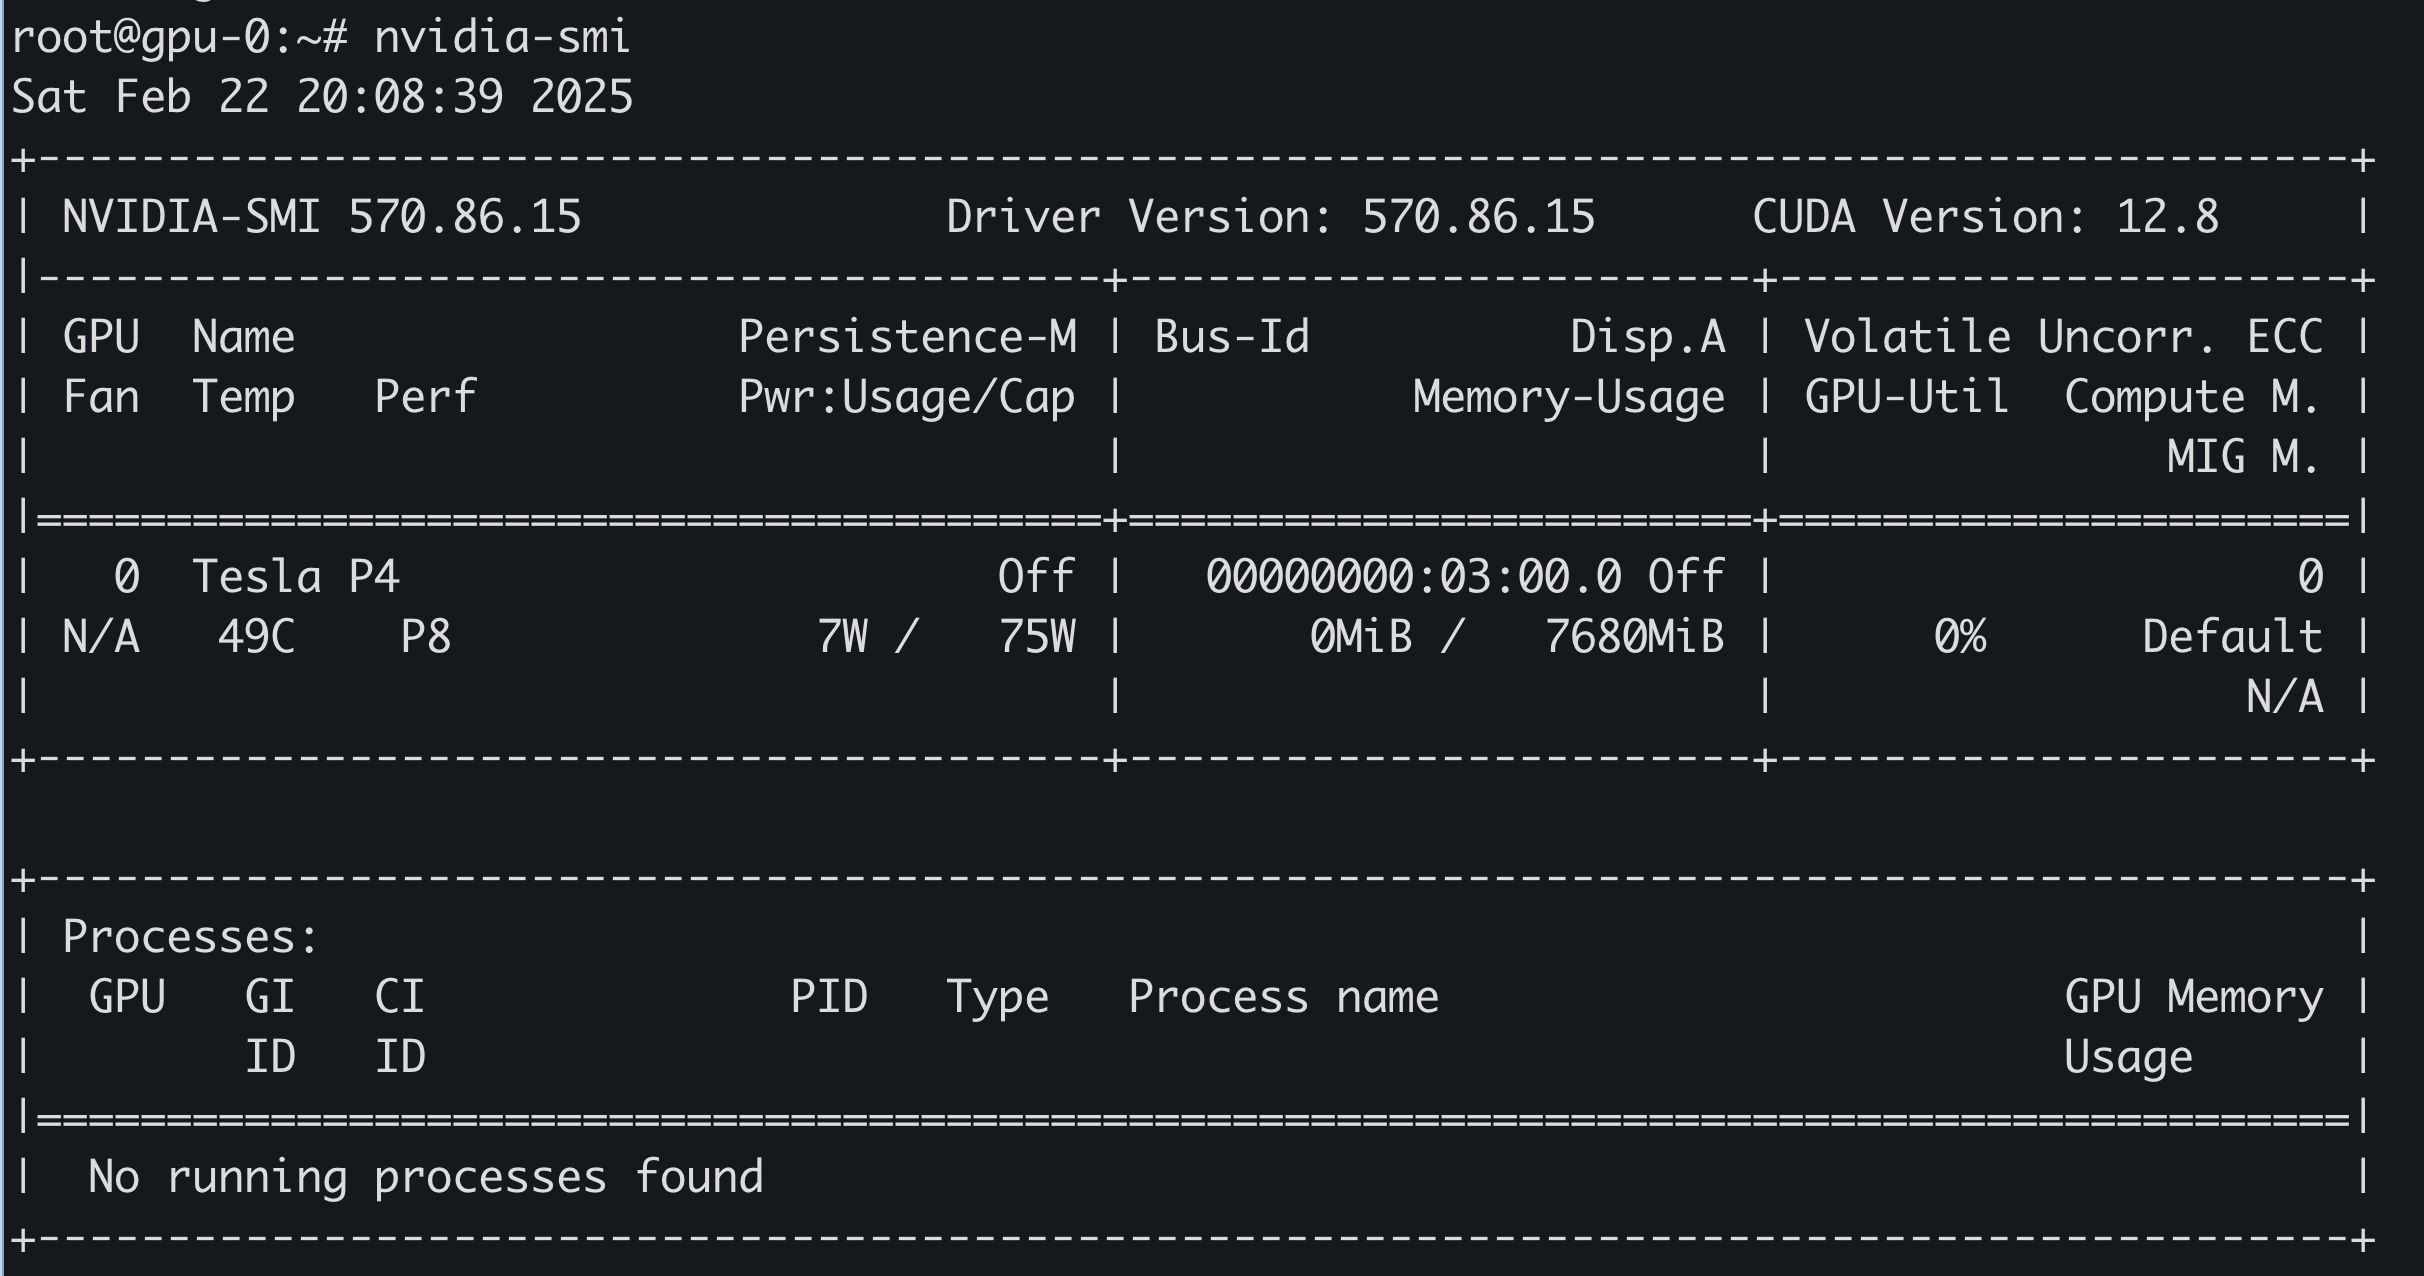
重启完成后,可以通过 nvidia-smi 查看 GPU 信息:
通过 Ubuntu PPA 安装驱动 也可以通过 Ubuntu PPA 安装驱动,但推荐安装的驱动版本可能较低:
1
2
3
4
5
6
7
8
9
10
11
root@gpu-0:~# ubuntu-drivers devices == /sys/devices/pci0000:03/0000:03:00.0 == modalias : pci:v000010DEd00001BB3sv000010DEsd000011D8bc03sc02i00 vendor : NVIDIA Corporation model : GP104GL [Tesla P4] driver : nvidia-driver-470-server - distro non-free driver : nvidia-driver-470 - distro non-free recommended driver : nvidia-driver-418-server - distro non-free driver : nvidia-driver-390 - distro non-free driver : nvidia-driver-450-server - distro non-free driver : xserver-xorg-video-nouveau - distro free builtin
根据输出内容,安装推荐版本:
1
2
apt -y install nvidia-driver-470 reboot
重启节点后会进入 Perform MOK management 页面,选择 EnrollMOK 并输入密码,完成后节点会再次重启。
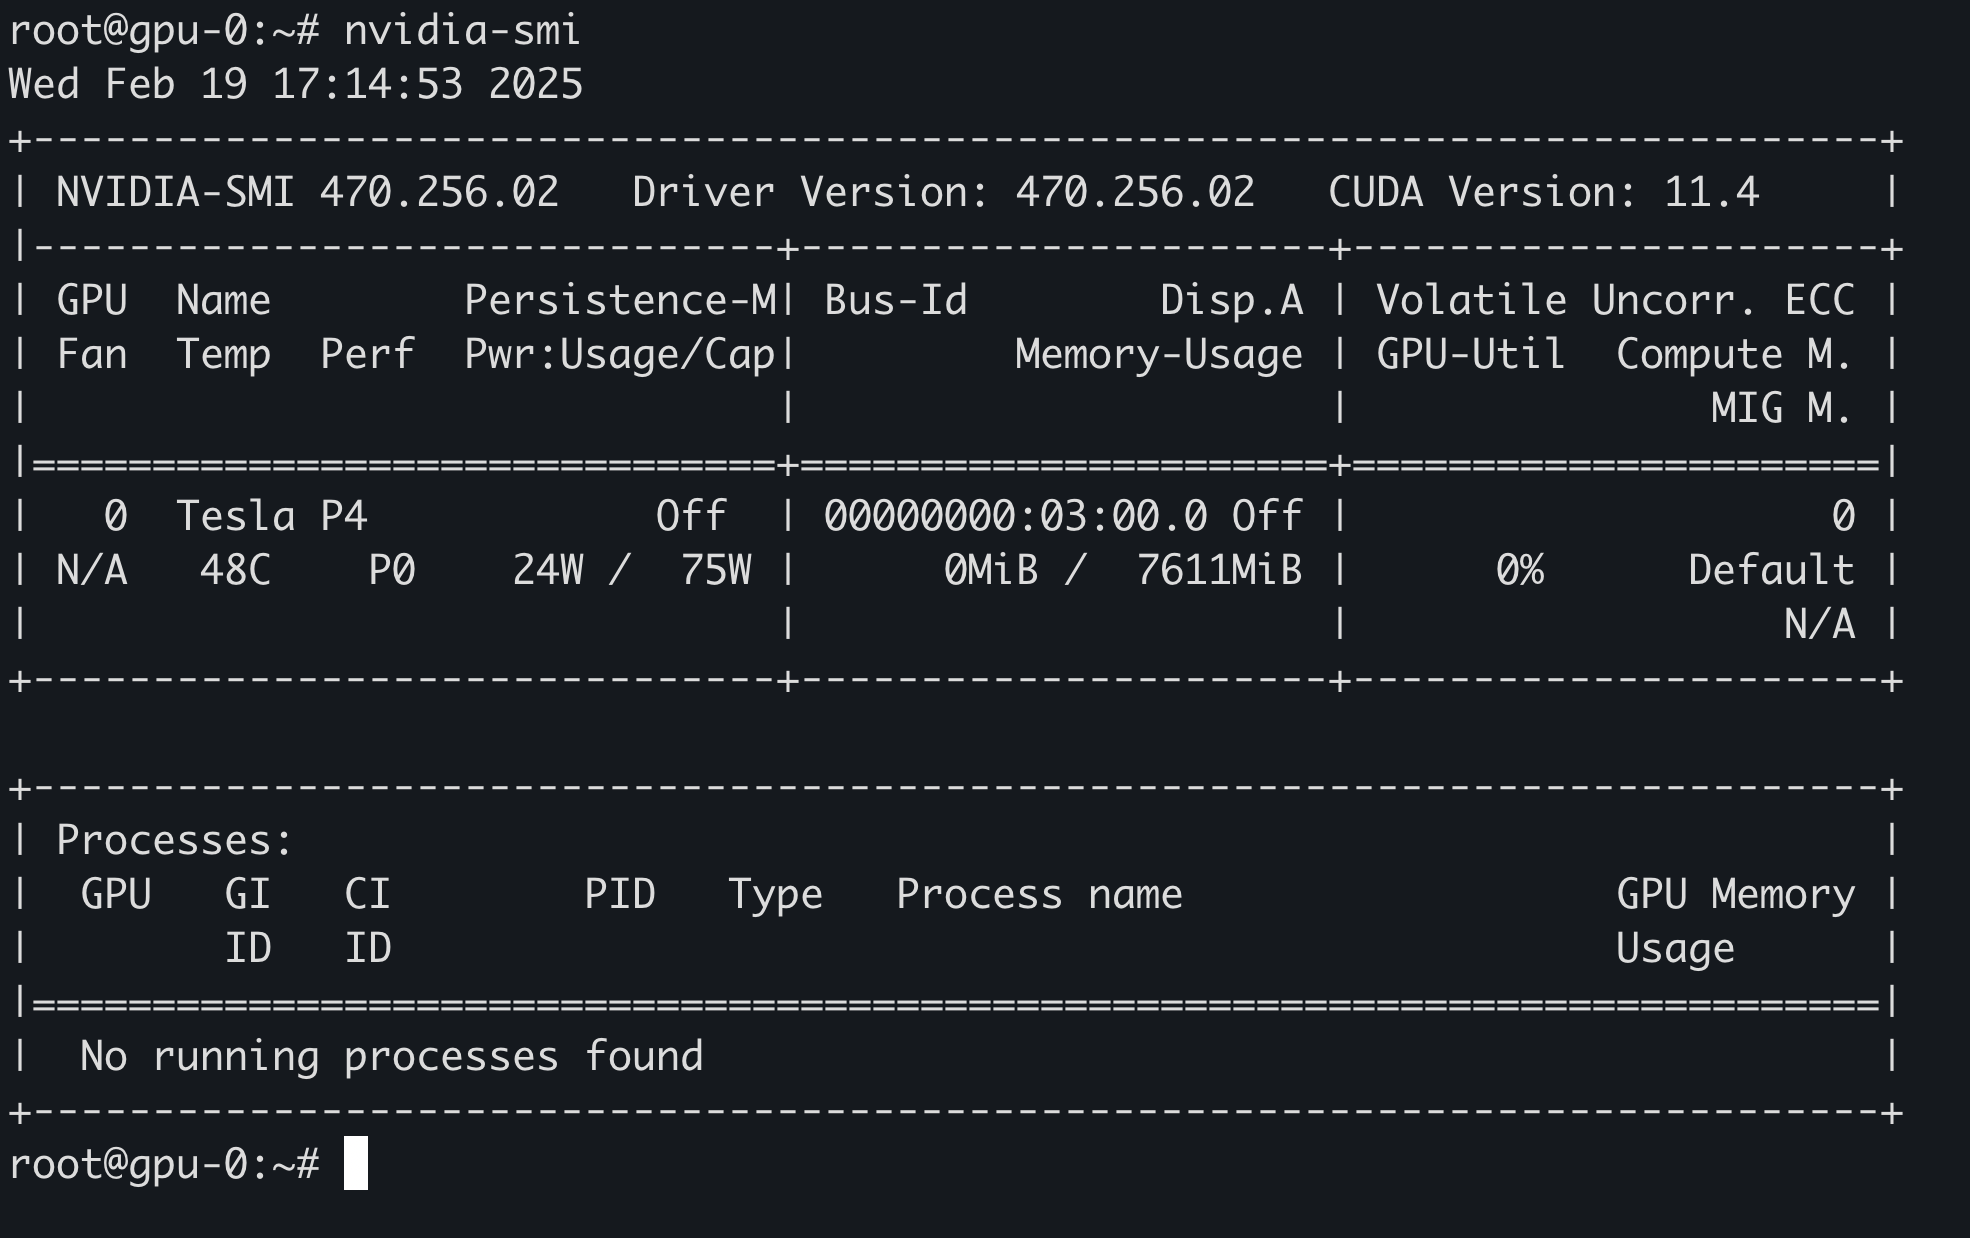
重启完成后,可以通过 nvidia-smi 查看 GPU 信息:
参考官方安装文档:Installing the NVIDIA Container Toolkit
安装 Nvidia Container Toolkit:
1
2
3
4
5
6
7
8
9
10
curl -fsSL https://nvidia.github.io/libnvidia-container/gpgkey | sudo gpg --dearmor -o /usr/share/keyrings/nvidia-container-toolkit-keyring.gpg \ && curl -s -L https://nvidia.github.io/libnvidia-container/stable/deb/nvidia-container-toolkit.list | \ sed 's#deb https://#deb [signed-by=/usr/share/keyrings/nvidia-container-toolkit-keyring.gpg] https://#g' | \ sudo tee /etc/apt/sources.list.d/nvidia-container-toolkit.list sed -i -e '/experimental/ s/^#//g' /etc/apt/sources.list.d/nvidia-container-toolkit.list apt-get update apt-get install -y nvidia-container-toolkit
RKE GPU 节点配置 Nvidia Container Runtime 节点需要先安装 Docker:
1 curl https://releases.rancher.com/install-docker/20.10.sh | sh
配置 Nvidia Container Runtime:
1
2
3
4
5
6
7
8
9
10
11
12
cat <<EOF > /etc/docker/daemon.json { "default-runtime": "nvidia", "insecure-registries" : [ "0.0.0.0/0" ], "runtimes": { "nvidia": { "path": "/usr/bin/nvidia-container-runtime", "runtimeArgs": [] } } } EOF
重启 Docker 并确认 Runtime 配置:
1
2
3
4
root@gpu-0:~# systemctl restart docker root@gpu-0:~# docker info | grep Runtime Runtimes: io.containerd.runc.v2 io.containerd.runtime.v1.linux nvidia runc Default Runtime: nvidia
测试容器是否可正常使用 GPU:
1
2
3
4
5
6
7
8
9
10
11
12
13
14
15
16
17
18
19
20
21
root@gpu-0:~# docker run --rm --runtime=nvidia --gpus all harbor.warnerchen.com/library/ubuntu:latest nvidia-smi Wed Feb 19 09:43:47 2025 +-----------------------------------------------------------------------------+ | NVIDIA-SMI 470.256.02 Driver Version: 470.256.02 CUDA Version: 11.4 | |-------------------------------+----------------------+----------------------+ | GPU Name Persistence-M| Bus-Id Disp.A | Volatile Uncorr. ECC | | Fan Temp Perf Pwr:Usage/Cap| Memory-Usage | GPU-Util Compute M. | | | | MIG M. | |===============================+======================+======================| | 0 Tesla P4 Off | 00000000:03:00.0 Off | 0 | | N/A 49C P0 23W / 75W | 0MiB / 7611MiB | 2% Default | | | | N/A | +-------------------------------+----------------------+----------------------+ +-----------------------------------------------------------------------------+ | Processes: | | GPU GI CI PID Type Process name GPU Memory | | ID ID Usage | |=============================================================================| | No running processes found | +-----------------------------------------------------------------------------+
RKE2 GPU 节点配置 Nvidia Container Runtime 新版本 RKE2 在启动时会自动检测节点上是否已安装 Nvidia Container Toolkit。如果检测到 Nvidia Container Runtime,会自动为 Containerd 生成相关配置,无需手动干预。
如果是在节点注册进 RKE2 集群后才安装 Nvidia Container Toolkit,只需重启该节点的 RKE2 服务,即可完成自动配置:
1
2
Apr 18 11:45:35 gpu-0 rke2[2226]: time="2025-04-18T11:45:35+08:00" level=debug msg="Searching for nvidia container runtime" Apr 18 11:45:35 gpu-0 rke2[2226]: time="2025-04-18T11:45:35+08:00" level=info msg="Found nvidia container runtime at /usr/bin/nvidia-container-runtime"
确认 Containerd 中是否已存在 Nvidia Runtime:
1
2
3
4
root@gpu-0:~# crictl info | grep -i nvidia "nvidia" : { "BinaryName" : "/usr/bin/nvidia-container-runtime" , "name" : "nvidia"
如果是旧版本 RKE2,需要手动修改配置:
1 2 3 vim /var/lib/rancher/rke2/agent/etc/containerd/config.toml.tmpl
添加以下内容:
1
2
3
4
5
6
7
{{ template "base" . }} [plugins."io.containerd.grpc.v1.cri".containerd.runtimes."nvidia"] runtime_type = "io.containerd.runc.v2" [plugins."io.containerd.grpc.v1.cri".containerd.runtimes."nvidia".options] BinaryName = "/usr/bin/nvidia-container-runtime"
重启节点上的 RKE2 服务:
1 2 systemctl restart rke2-server
如果需要将 Nvidia Runtime 修改为默认 Runtime,则需要手动配置:
1 2 3 vim /var/lib/rancher/rke2/agent/etc/containerd/config.toml.tmpl
参考文档:https://github.com/containerd/containerd/blob/main/docs/cri/config.md#runtime-classes
如果是 containerd 2.x,新增以下内容:
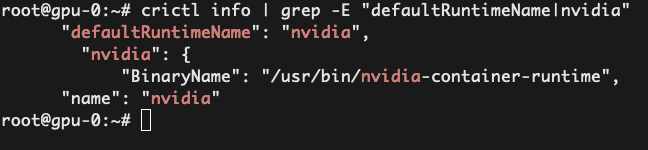
1
2
3
4
{{ template "base" . }} [plugins."io.containerd.cri.v1.runtime".containerd] default_runtime_name = "nvidia"
如果是 containerd 1.x,新增以下内容:
1
2
3
4
{{ template "base" . }} [plugins."io.containerd.grpc.v1.cri".containerd] default_runtime_name = "nvidia"
重启节点上的 RKE2 服务:
1 2 systemctl restart rke2-server
GPU Operator NVIDIA GPU Operator 是 NVIDIA 提供的一个 Kubernetes Operator,用于自动部署、配置和管理 Kubernetes 集群中的 GPU 软件栈。
它遵循 Kubernetes Operator 模式,通过一个 ClusterPolicy CR 来自动安装和维护 GPU 相关组件,无需手动安装和配置每个节点。
安装 GPU Operator 添加 Nvidia Helm Chart 仓库:
1 helm repo add nvidia https://nvidia.github.io/helm-charts/
配置 containerd.sock 和 config.toml 文件路径:
1
2
3
4
5
6
7
8
9
10
11
12
13
cat <<EOF > gpu-operator-values.yaml toolkit: enabled: true env: - name: CONTAINERD_CONFIG value: /var/lib/rancher/rke2/agent/etc/containerd/config.toml - name: CONTAINERD_SOCKET value: /run/k3s/containerd/containerd.sock # 如果节点已有 GPU 且已经安装驱动,需要关闭该选项,避免 Operator 再次执行驱动安装 driver: enabled: false EOF
安装 GPU Operator:
1 helm -n gpu-operator upgrade --install gpu-operator nvidia/gpu-operator -f gpu-operator-values.yaml --create-namespace
除了前面提到的手动安装驱动方式,也可以将 GPU 节点接入集群后,再通过 GPU Operator 自动安装驱动(即 driver.enabled 参数,默认为 true)。
当 Operator 检测到节点存在 GPU 时,会启动 nvidia-driver-daemonset Pod 进行编译安装:
1
2
3
4
5
6
7
8
9
10
11
12
13
14
Installation of the kernel module for the NVIDIA Accelerated Graphics Driver for Linux-x86_64 (version: 580.126.20) is now complete. Configuring the following firmware search path in '/sys/module/firmware_class/parameters/path': /run/nvidia/driver/lib/firmware Loading ipmi and i2c_core kernel modules... Loading NVIDIA driver kernel modules... + modprobe nvidia + modprobe nvidia-uvm + modprobe nvidia-modeset + set +o xtrace -o nounset Starting NVIDIA persistence daemon... Mounting NVIDIA driver rootfs... Storing driver configuration digest... Driver configuration digest stored at /run/nvidia/nvidia-driver.state Done, now waiting for signal
安装完成后,查看相关信息:
1
2
3
4
5
6
7
8
9
root@gpu-0:~# lsmod | grep nvidia nvidia_modeset 1622016 0 nvidia_uvm 1781760 4 nvidia 104058880 26 nvidia_uvm,nvidia_modeset drm 622592 7 vmwgfx,drm_kms_helper,nvidia,drm_ttm_helper,ttm cat /proc/driver/nvidia/versionNVRM version: NVIDIA UNIX x86_64 Kernel Module 580.126.20 Wed Feb 18 05:56:34 UTC 2026 GCC version: gcc version 12.3.0 (Ubuntu 12.3.0-1ubuntu1~22.04.3)
通过 kubectl 检查节点信息,可以看到可分配的 GPU 资源:
1
2
3
4
5
6
7
8
9
10
11
12
13
14
15
16
Capacity: cpu: 8 ephemeral-storage: 101604892Ki hugepages-1Gi: 0 hugepages-2Mi: 0 memory: 16371624Ki nvidia.com/gpu: 1 pods: 110 Allocatable: cpu: 8 ephemeral-storage: 98841238861 hugepages-1Gi: 0 hugepages-2Mi: 0 memory: 16371624Ki nvidia.com/gpu: 1 pods: 110
创建 Pod 验证 GPU 资源:
1
2
3
4
5
6
7
8
9
10
11
12
13
14
15
16
17
18
19
20
21
22
cat <<EOF | kubectl apply -f - apiVersion: v1 kind: Pod metadata: name: nbody-gpu-benchmark namespace: default spec: restartPolicy: OnFailure runtimeClassName: nvidia containers: - name: cuda-container image: harbor.warnerchen.com/nvidia/k8s/cuda-sample:nbody args: ["nbody", "-gpu", "-benchmark"] resources: limits: nvidia.com/gpu: 1 env: - name: NVIDIA_VISIBLE_DEVICES value: all - name: NVIDIA_DRIVER_CAPABILITIES value: all EOF
查看日志,确认运行成功:
1
2
3
4
5
6
7
8
9
10
11
12
13
14
15
16
17
18
19
20
21
22
23
24
25
root@rke2-cilium-01:~# kubectl logs nbody-gpu-benchmark Run "nbody -benchmark [-numbodies=<numBodies>]" to measure performance. -fullscreen (run n-body simulation in fullscreen mode) -fp64 (use double precision floating point values for simulation) -hostmem (stores simulation data in host memory) -benchmark (run benchmark to measure performance) -numbodies=<N> (number of bodies (>= 1) to run in simulation) -device=<d> (where d=0,1,2.... for the CUDA device to use) -numdevices=<i> (where i=(number of CUDA devices > 0) to use for simulation) -compare (compares simulation results running once on the default GPU and once on the CPU) -cpu (run n-body simulation on the CPU) -tipsy=<file.bin> (load a tipsy model file for simulation) NOTE: The CUDA Samples are not meant for performance measurements. Results may vary when GPU Boost is enabled. > Windowed mode > Simulation data stored in video memory > Single precision floating point simulation > 1 Devices used for simulation GPU Device 0: "Pascal" with compute capability 6.1 > Compute 6.1 CUDA device: [Tesla P4] 20480 bodies, total time for 10 iterations: 27.727 ms = 151.272 billion interactions per second = 3025.446 single-precision GFLOP/s at 20 flops per interaction