Longhorn 除了提供传统的 v1 Data Engine 外,还支持基于 SPDK(Storage Performance Development Kit)的 v2 Data Engine。v2 Data Engine 已在 Longhorn v1.12.0 版本中正式 GA(General Availability)。
v1 与 v2 Data Engine 的主要区别如下:
| 对比项 |
Data Engine v1 |
Data Engine v2 |
| 数据路径 |
在 Instance Manager 中运行各 Volume 的 Engine 和 Replica 进程,通常通过 iSCSI 向主机提供块设备 |
基于 SPDK,Replica 存储在原始块设备上的逻辑卷中,常规 blockdev 前端通过 NVMe/TCP 向主机提供块设备 |
| 节点磁盘 |
使用 filesystem 类型的磁盘,需要先格式化为 ext4/XFS 文件系统并挂载 |
使用 block 类型的磁盘,由 Longhorn 直接管理未格式化的原始块设备,优先推荐本地 NVMe |
| 节点资源 |
主要根据工作负载和 Replica 数量规划资源 |
额外需要为 SPDK 分配内存和专用 CPU,默认预留 2 GiB HugePages |
| 快照删除 |
删除 volume-head 的直接父快照后,可能先将其标记为移除,随后通过 Purge 操作清理 |
支持在线合并,删除操作完成后快照即被移除 |
| 功能差异 |
支持 strict-local 数据本地性 |
不支持 strict-local,但支持 v1 不具备的快速 Volume 克隆和 QoS |
| RWO / RWX |
RWO 使用块设备,普通 RWX 通过 Share Manager 提供 NFS 服务 |
同样支持 RWO 和普通 RWX,RWX 仍然依赖 NFS Client |
本文基于 Longhorn v2 Data Engine 进行实践。
环境信息
- Longhorn:v1.12.1
- Kubernetes:RKE2 v1.35.8+rke2r1
- 集群规模:3 个节点
- 节点规格:每个节点
8c16g
- 节点 Kernel:6.8.0-138-generic
安装前准备
在所有节点安装依赖项:
1
2
| apt update
apt install -y linux-modules-extra-`uname -r`
|
加载所需的内核模块:
1
2
3
4
5
6
7
8
9
10
11
|
modprobe vfio_pci
modprobe uio_pci_generic
modprobe nvme-tcp
cat <<EOF > /etc/modules-load.d/longhorn-v2-data-engine-modules.conf
vfio_pci
uio_pci_generic
nvme_tcp
EOF
|
配置 HugePages:
1
2
3
4
|
vim /etc/default/grub
update-grub
reboot
|
使用 longhornctl 进行预检:
1
2
3
| longhornctl --kubeconfig ~/.kube/config \
--image harbor.warnerchen.com/rancher/mirrored-longhornio-longhorn-cli:v1.12.1 \
check preflight --enable-spdk
|
如果缺少依赖,也可以通过 longhornctl 自动安装:
1
2
3
| longhornctl --kubeconfig ~/.kube/config \
--image harbor.warnerchen.com/rancher/mirrored-longhornio-longhorn-cli:v1.12.1 \
install preflight --enable-spdk
|
开启 v2 Data Engine
本文在已有的 Longhorn 环境中启用 v2 Data Engine。
准备 Helm Chart Values:
1
2
3
4
5
6
7
8
9
10
11
12
13
14
15
16
17
18
19
20
21
22
23
24
25
26
27
28
29
30
31
32
33
34
35
36
37
38
39
40
41
42
43
44
45
46
47
48
49
50
51
| cat <<EOF > longhorn-v2-data-engine-values.yaml
global:
imageRegistry: "harbor.warnerchen.com"
image:
longhorn:
engine:
repository: rancher/mirrored-longhornio-longhorn-engine
manager:
repository: rancher/mirrored-longhornio-longhorn-manager
ui:
repository: rancher/mirrored-longhornio-longhorn-ui
instanceManager:
repository: rancher/mirrored-longhornio-longhorn-instance-manager
shareManager:
repository: rancher/mirrored-longhornio-longhorn-share-manager
backingImageManager:
repository: rancher/mirrored-longhornio-backing-image-manager
supportBundleKit:
repository: rancher/mirrored-longhornio-support-bundle-kit
csi:
attacher:
repository: rancher/mirrored-longhornio-csi-attacher
provisioner:
repository: rancher/mirrored-longhornio-csi-provisioner
nodeDriverRegistrar:
repository: rancher/mirrored-longhornio-csi-node-driver-registrar
resizer:
repository: rancher/mirrored-longhornio-csi-resizer
snapshotter:
repository: rancher/mirrored-longhornio-csi-snapshotter
livenessProbe:
repository: rancher/mirrored-longhornio-livenessprobe
service:
ui:
type: NodePort
persistence:
# 后续测试手动创建用途明确的 StorageClass
createStorageClass: false
dataEngine: v1
defaultSettings:
# 同时启用 v1 和 v2 Data Engine
v1DataEngine: true
v2DataEngine: true
# 不自动创建 /var/lib/longhorn 类型的默认磁盘,后续手动添加磁盘
createDefaultDiskLabeledNodes: true
EOF
|
更新 Longhorn:
1
2
3
4
| helm upgrade --install longhorn longhorn/longhorn \
--namespace longhorn-system \
--version 1.12.1 \
-f longhorn-v2-data-engine-values.yaml
|
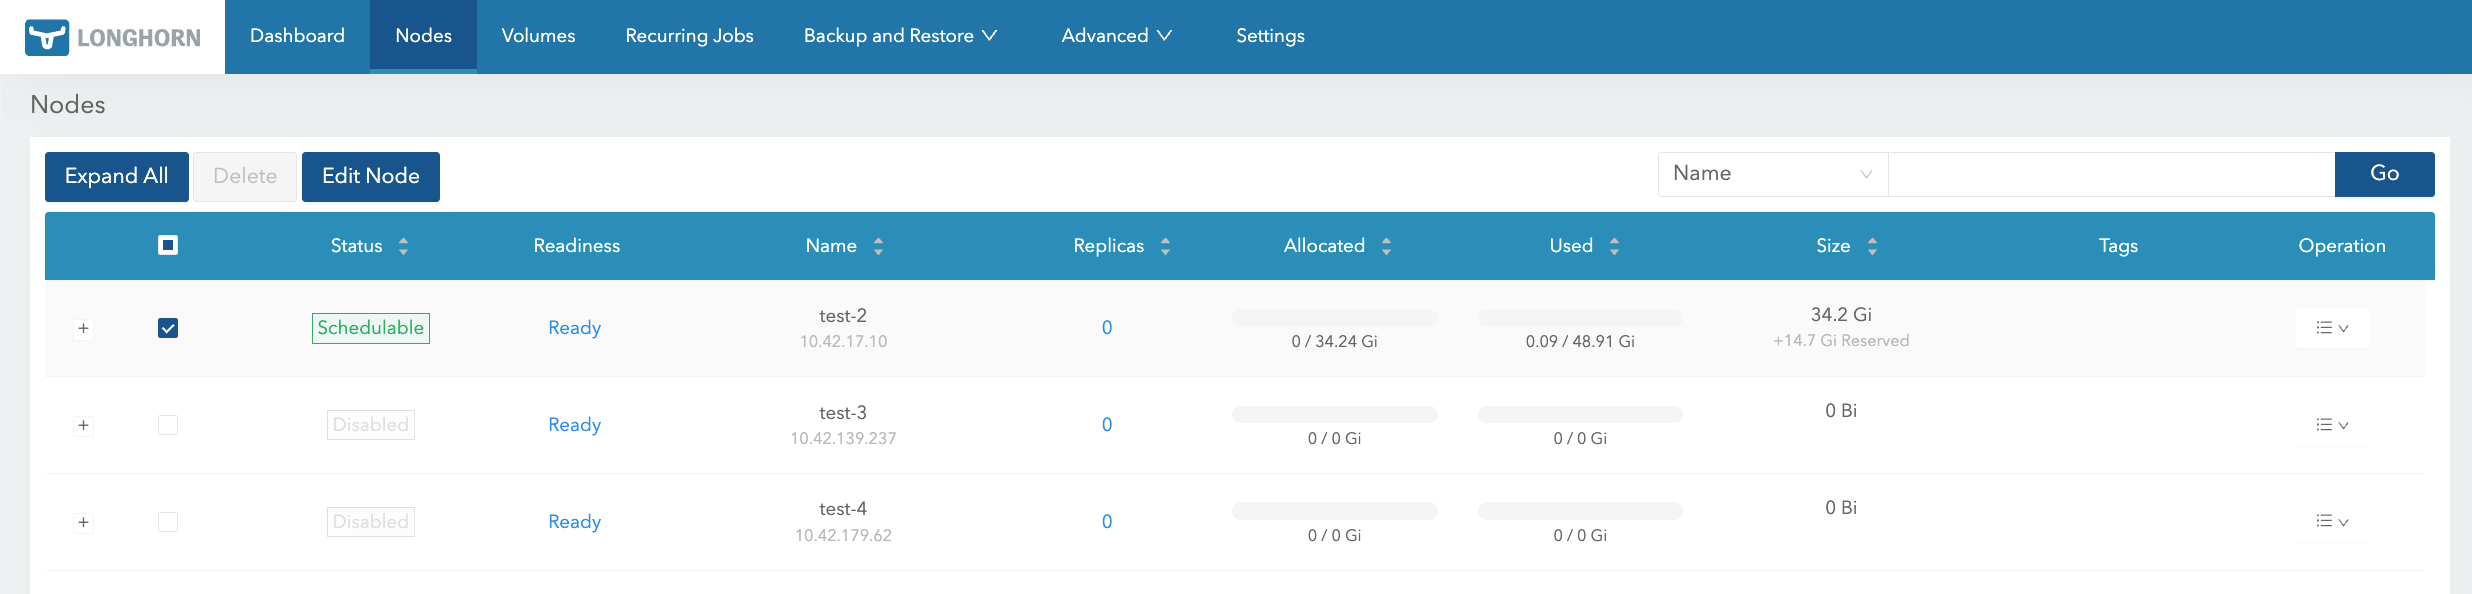
常用功能
添加原始块设备
首先,在存储节点上检查磁盘是否存在文件系统或分区表签名:
如果存在相关签名,需要清除磁盘上的签名信息:
Longhorn v2 Data Engine 要求使用未格式化的原始块设备。如果磁盘上仍存在文件系统或分区表签名,Longhorn 将拒绝将其添加为 v2 磁盘。
注意:
执行 wipefs -a /dev/sdx 前,必须确认设备身份,并确保磁盘上的数据可以被清除。
不要对该磁盘执行 mkfs.ext4,也不要将其挂载到 /var/lib/longhorn。
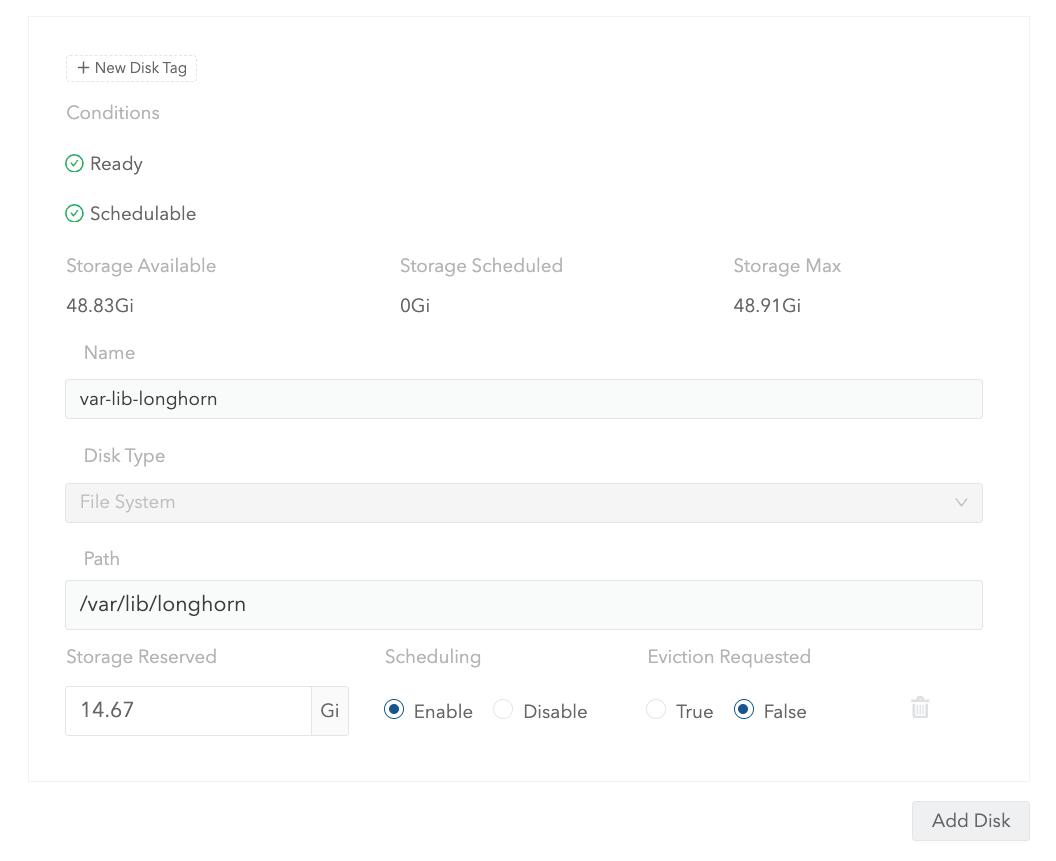
通过 Longhorn UI 添加 Block 类型的磁盘:
注意:
磁盘 Path 建议使用 BDF(例如 0000:05:00.0),或者 /dev/disk/by-id/... 下的稳定设备路径。
如果使用 VMware 虚拟机进行测试,还需要为虚拟机添加 disk.EnableUUID=TRUE 参数,以确保能够找到对应的 /dev/disk/by-id/ 设备路径。
创建 v2 StorageClass 并验证 RWO Volume
创建使用 v2 Data Engine 的 StorageClass:
1
2
3
4
5
6
7
8
9
10
11
12
13
14
| cat <<EOF | kubectl apply -f -
apiVersion: storage.k8s.io/v1
kind: StorageClass
metadata:
name: longhorn-v2-ssd
provisioner: driver.longhorn.io
allowVolumeExpansion: true
reclaimPolicy: Retain
volumeBindingMode: Immediate
parameters:
dataEngine: "v2"
numberOfReplicas: "3"
diskSelector: "ssd"
EOF
|
创建 PVC 和 Workload:
1
2
3
4
5
6
7
8
9
10
11
12
13
14
15
16
17
18
19
20
21
22
23
24
25
26
27
28
29
30
31
32
33
34
35
36
37
38
39
40
| cat <<EOF | kubectl apply -f -
apiVersion: v1
kind: PersistentVolumeClaim
metadata:
name: app-rwo-pvc
namespace: default
spec:
accessModes:
- ReadWriteOnce
storageClassName: longhorn-v2-ssd
resources:
requests:
storage: 10Gi
---
apiVersion: apps/v1
kind: Deployment
metadata:
name: app-rwo
namespace: default
spec:
replicas: 1
selector:
matchLabels:
app: app-rwo
template:
metadata:
labels:
app: app-rwo
spec:
containers:
- name: nginx
image: harbor.warnerchen.com/library/nginx:mainline
volumeMounts:
- name: data
mountPath: /data
volumes:
- name: data
persistentVolumeClaim:
claimName: app-rwo-pvc
EOF
|
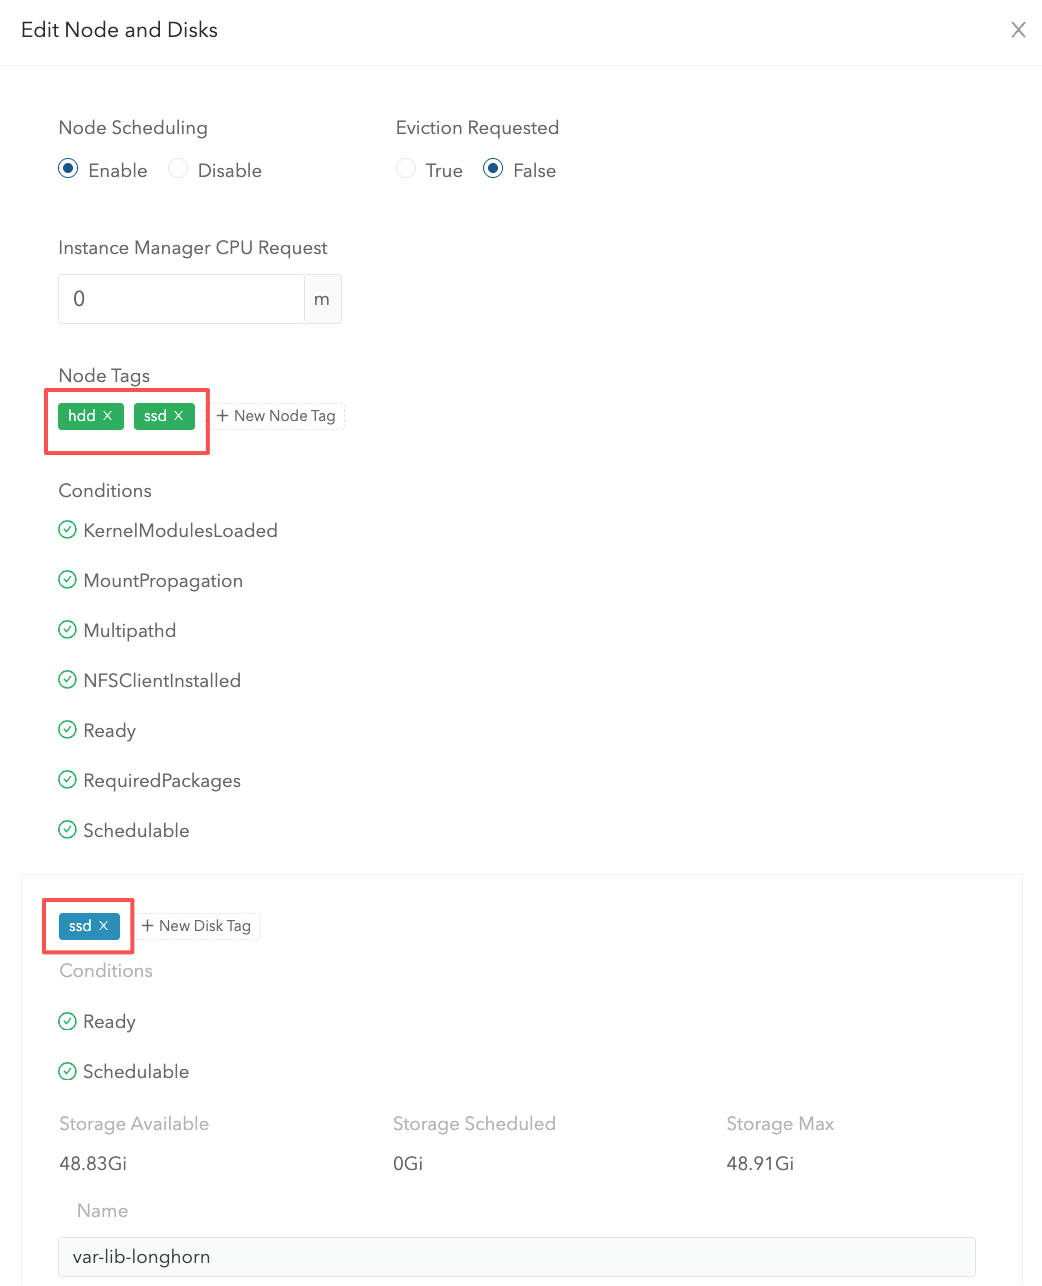
通过 Longhorn UI 查看 Volume 状态:

验证 v2 RWX Volume
创建 PVC 和 Workload:
1
2
3
4
5
6
7
8
9
10
11
12
13
14
15
16
17
18
19
20
21
22
23
24
25
26
27
28
29
30
31
32
33
34
35
36
37
38
39
40
41
| cat <<EOF | kubectl apply -f -
apiVersion: v1
kind: PersistentVolumeClaim
metadata:
name: app-rwx-pvc
namespace: default
spec:
accessModes:
- ReadWriteMany
volumeMode: Filesystem
storageClassName: longhorn-v2-ssd
resources:
requests:
storage: 10Gi
---
apiVersion: apps/v1
kind: Deployment
metadata:
name: app-rwx
namespace: default
spec:
replicas: 3
selector:
matchLabels:
app: app-rwx
template:
metadata:
labels:
app: app-rwx
spec:
containers:
- name: nginx
image: harbor.warnerchen.com/library/nginx:mainline
volumeMounts:
- name: shared-data
mountPath: /data
volumes:
- name: shared-data
persistentVolumeClaim:
claimName: app-rwx-pvc
EOF
|
通过 Longhorn UI 查看 Volume 状态:

v1 与 v2 Data Engine 性能对比
RWO Volume 性能测试
为了对比 v1 和 v2 Data Engine 在 RWO 场景下的性能,采用以下测试方法:
- 分别使用
longhorn-v1-ssd 和 longhorn-v2-ssd 创建容量及 Replica 数量相同的专用测试 PVC,容量均为 10 GiB。
- 选择容量、型号及负载一致的 v1 文件系统磁盘和 v2 原始块设备。
- 将两个 PVC 挂载到同一个包含 fio 的测试 Workload 中,依次执行性能测试。
创建 PVC 和 Workload:
1
2
3
4
5
6
7
8
9
10
11
12
13
14
15
16
17
18
19
20
21
22
23
24
25
26
27
28
29
30
31
32
33
34
35
36
37
38
39
40
41
42
43
44
45
46
47
48
49
50
51
52
53
54
55
56
57
58
59
60
61
62
63
|
cat <<EOF | kubectl apply -f -
apiVersion: v1
kind: PersistentVolumeClaim
metadata:
name: v1-rwo-pvc
namespace: default
spec:
accessModes:
- ReadWriteOnce
storageClassName: longhorn-v1-ssd
resources:
requests:
storage: 10Gi
---
apiVersion: v1
kind: PersistentVolumeClaim
metadata:
name: v2-rwo-pvc
namespace: default
spec:
accessModes:
- ReadWriteOnce
storageClassName: longhorn-v2-ssd
resources:
requests:
storage: 10Gi
---
apiVersion: apps/v1
kind: Deployment
metadata:
name: fio
namespace: default
spec:
replicas: 1
selector:
matchLabels:
app: fio
template:
metadata:
labels:
app: fio
spec:
containers:
- name: fio
image: xridge/fio
command:
- sh
- -c
- sleep 360000
volumeMounts:
- name: v1-rwo-pvc
mountPath: /data/v1
- name: v2-rwo-pvc
mountPath: /data/v2
volumes:
- name: v1-rwo-pvc
persistentVolumeClaim:
claimName: v1-rwo-pvc
- name: v2-rwo-pvc
persistentVolumeClaim:
claimName: v2-rwo-pvc
EOF
|
在同一个 Pod 中,依次对挂载在 /data/v1 和 /data/v2 的 RWO Volume 进行性能测试:
1
2
3
4
5
6
7
8
9
10
11
12
13
14
15
16
17
18
19
20
21
|
kubectl exec <fio_pod_name> -- fio \
--name=rwo-randrw \
--filename=/data/v1/fio-rwo.dat \
--size=2G \
--rw=randrw --rwmixread=70 --bs=4k \
--ioengine=libaio --direct=1 --iodepth=32 --numjobs=1 \
--ramp_time=15 --runtime=120 --time_based \
--group_reporting
kubectl exec <fio_pod_name> -- fio \
--name=rwo-randrw \
--filename=/data/v2/fio-rwo.dat \
--size=2G \
--rw=randrw --rwmixread=70 --bs=4k \
--ioengine=libaio --direct=1 --iodepth=32 --numjobs=1 \
--ramp_time=15 --runtime=120 --time_based \
--group_reporting
|
三轮测试的 IOPS 和带宽结果如下:
| 轮次 |
Data Engine |
读 IOPS |
写 IOPS |
总 IOPS |
总带宽 |
| 1 |
v1 |
3,688 |
1,582 |
5,270 |
20.59 MiB/s |
| 1 |
v2 |
6,557 |
2,814 |
9,371 |
36.61 MiB/s |
| 2 |
v1 |
3,847 |
1,651 |
5,498 |
21.48 MiB/s |
| 2 |
v2 |
6,962 |
2,988 |
9,950 |
38.87 MiB/s |
| 3 |
v1 |
3,679 |
1,578 |
5,257 |
20.54 MiB/s |
| 3 |
v2 |
6,523 |
2,799 |
9,322 |
36.41 MiB/s |
| 三轮均值 |
v1 |
3,738 |
1,604 |
5,342 |
20.87 MiB/s |
| 三轮均值 |
v2 |
6,681 |
2,867 |
9,548 |
37.30 MiB/s |
从测试结果来看,v2 Data Engine 在 IOPS 和带宽方面均明显优于 v1 Data Engine。
三轮测试的延迟结果如下(单位:ms):
| 轮次 |
Data Engine |
读平均延迟 |
写平均延迟 |
读 P99 延迟 |
写 P99 延迟 |
| 1 |
v1 |
5.95 |
6.03 |
13.30 |
12.26 |
| 1 |
v2 |
3.32 |
3.50 |
8.98 |
6.19 |
| 2 |
v1 |
5.55 |
6.11 |
11.73 |
12.52 |
| 2 |
v2 |
2.97 |
3.66 |
5.21 |
6.13 |
| 3 |
v1 |
5.97 |
6.04 |
13.70 |
12.78 |
| 3 |
v2 |
3.39 |
3.41 |
9.50 |
5.87 |
| 三轮均值 |
v1 |
5.83 |
6.06 |
12.91 |
12.52 |
| 三轮均值 |
v2 |
3.23 |
3.52 |
7.90 |
6.06 |
从测试结果来看,v2 Data Engine 的平均延迟和 P99 延迟均低于 v1 Data Engine。
RWX Volume 性能测试
创建 PVC 和 Workload:
1
2
3
4
5
6
7
8
9
10
11
12
13
14
15
16
17
18
19
20
21
22
23
24
25
26
27
28
29
30
31
32
33
34
35
36
37
38
39
40
41
42
43
44
45
46
47
48
49
50
51
52
53
54
55
56
57
58
59
60
61
62
63
|
cat <<EOF | kubectl apply -f -
apiVersion: v1
kind: PersistentVolumeClaim
metadata:
name: v1-rwx-pvc
namespace: default
spec:
accessModes:
- ReadWriteMany
storageClassName: longhorn-v1-ssd
resources:
requests:
storage: 10Gi
---
apiVersion: v1
kind: PersistentVolumeClaim
metadata:
name: v2-rwx-pvc
namespace: default
spec:
accessModes:
- ReadWriteMany
storageClassName: longhorn-v2-ssd
resources:
requests:
storage: 10Gi
---
apiVersion: apps/v1
kind: Deployment
metadata:
name: fio
namespace: default
spec:
replicas: 3
selector:
matchLabels:
app: fio
template:
metadata:
labels:
app: fio
spec:
containers:
- name: fio
image: xridge/fio
command:
- sh
- -c
- sleep 360000
volumeMounts:
- name: v1-rwx-pvc
mountPath: /data/v1
- name: v2-rwx-pvc
mountPath: /data/v2
volumes:
- name: v1-rwx-pvc
persistentVolumeClaim:
claimName: v1-rwx-pvc
- name: v2-rwx-pvc
persistentVolumeClaim:
claimName: v2-rwx-pvc
EOF
|
同时在三个 Pod 中执行性能测试,并将测试结果输出为独立文件:
1
2
3
4
5
6
7
8
9
10
11
12
13
14
15
16
17
| POD=<fio_pod_name>
ENGINE=v1
FILE="/data/$ENGINE/01-rwx-$POD.dat"
kubectl exec "$POD" -- fio \
--name=prepare --filename="$FILE" --rw=write --bs=1M \
--ioengine=psync --direct=1 --size=1G --end_fsync=1 \
--output-format=json
kubectl exec "$POD" -- fio \
--name=rwx-randrw --filename="$FILE" \
--rw=randrw --rwmixread=70 --bs=4k \
--ioengine=psync --iodepth=1 --numjobs=1 --direct=1 \
--size=1G --time_based --ramp_time=30 --runtime=120 \
--output-format=json
|
根据 Share Manager 与 fio Pod 所在节点的位置关系,分别测试以下四种场景:
- v1 的 Share Manager 位于本机,v2 的 Share Manager 位于远端。
- v1 的 Share Manager 位于远端,v2 的 Share Manager 位于本机。
- v1 和 v2 的 Share Manager 均位于远端。
- v1 和 v2 的 Share Manager 均位于本机。
每个场景执行四轮测试,并交替调整 v1 和 v2 的测试顺序:
- 第一轮和第三轮:先测试 v1,再测试 v2。
- 第二轮和第四轮:先测试 v2,再测试 v1。
说明:
本机表示 fio Pod 与对应的 Share Manager 运行在同一个节点上,远端则表示两者运行在不同节点上。
表格中的总 IOPS 为对应 fio Pod 四轮测试结果的平均值。
后两轮差异指只取第三、四轮的结果:先算 v1 在这两轮的平均 IOPS,再算 v2 的平均 IOPS,最后用 (v2 平均值 ÷ v1 平均值 − 1) 得到百分比。每一轮都包含一次 v1 和一次 v2 测试。
场景一:v1 本机,v2 远端
| v1 读 IOPS |
v1 写 IOPS |
v1 总 IOPS |
v2 读 IOPS |
v2 写 IOPS |
v2 总 IOPS |
四轮差异 |
后两轮差异 |
| 288.0 |
122.7 |
410.7 |
284.5 |
121.1 |
405.6 |
−1.3% |
−0.2% |
结论: 在该场景下,v1 的性能略优于 v2,但两者差异较小。
场景二:v1 远端,v2 本机
| v1 读 IOPS |
v1 写 IOPS |
v1 总 IOPS |
v2 读 IOPS |
v2 写 IOPS |
v2 总 IOPS |
四轮差异 |
后两轮差异 |
| 236.8 |
101.1 |
337.9 |
345.0 |
147.9 |
492.9 |
+45.9% |
+44.7% |
结论: 在该场景下,v2 的性能明显优于 v1。
场景三:两个 Share Manager 均位于远端
记录三个 fio Pod 的结果:
| v1 读 IOPS |
v1 写 IOPS |
v1 总 IOPS |
v2 读 IOPS |
v2 写 IOPS |
v2 总 IOPS |
四轮差异 |
后两轮差异 |
| 243.0 |
103.7 |
346.7 |
284.0 |
121.0 |
404.9 |
+16.8% |
+12.8% |
结论: 在该场景下,v2 的性能优于 v1。
场景四:两个 Share Manager 均位于本机
| v1 读 IOPS |
v1 写 IOPS |
v1 总 IOPS |
v2 读 IOPS |
v2 写 IOPS |
v2 总 IOPS |
四轮差异 |
后两轮差异 |
| 315.7 |
134.8 |
450.5 |
371.3 |
159.0 |
530.3 |
+17.7% |
+15.5% |
结论: 在该场景下,v2 的性能优于 v1。
测试结论
- RWO Volume: v2 Data Engine 的性能优势较为明显。在测试中,v2 的 IOPS 和带宽均高于 v1,同时平均延迟和 P99 延迟也更低。
- RWX Volume: v2 Data Engine 整体上也具有一定的性能优势,但测试结果受到 Share Manager 所在节点位置的显著影响。
测试仅供参考,具体性能表现需要视环境情况而定。